|
Here is the second of three projects to get students motivated and also get them thinking in new and exciting ways! The Bloxels game projectThis project is quite a few steps up from the previous one, the cardboard arcade game project. It will push your students to think in ways that will push them out of their comfort zone and guess what? That is great! For this project you will want to stress the idea of managing time, meeting a deadline and instead of groups, the students will work alone. Also, students will tell their story in three different ways and this will allow them to see that they can show what they know in other ways than just the written word. This is especially important for those students who may have difficulty expressing themselves via written word or even orally. Step 1: Let's write a story!Start off by telling students that they will write the backstory to a video game they will create. Don't hide what the endgame will be and instead express how this will be their story to tell, develop and create as something interactive at the end. Depending on the grade you are teaching, have them write a minimum that works with their content standards. For example, with 5th and 6th grade I made sure to have them write a 5 paragraph narrative essay. If you are working with younger students, please make sure to modify as needed. One last thing, don't let students move on to the next step till the story has been read by other students, revised and submitted. Give it a quick read and give the okay or have students go back and work on it till the story is more fleshed out. Below I've made a list of things to make sure you hit upon so students understand what is expected and also allows for you to avoid any headaches.
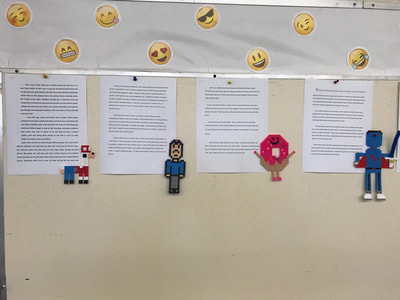
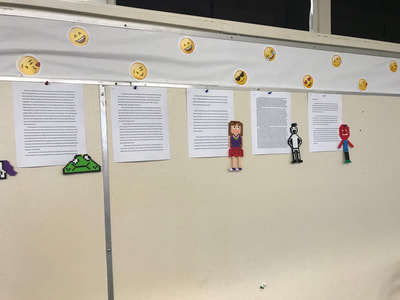
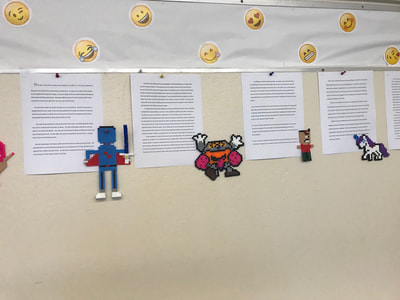
Step 2: Have the main character come to life!Here's a chance to "sneak" in some art, which can be difficult to do at times. Using graphing paper, have students create an 8-bit representation of their main character. Here are some examples of 8-bit graphics just in case you want to double check what it looks like or share with students. Some students will try and draw their character using round lines as if it were the usual blank piece of paper. No need to redirect and for these students it will be a great teachable moment. Once students have drawn their character, students will bring their characters to life using perler beads and perler boards. Click on any of the following links to purchase supplies at Amazon, Walmart, Michaels and Joanns (by the way, Joanns usually has them on sale and they stack their coupons!) Once students have finished their perler, make sure you iron it for them! Need help with how to iron perlers? Look below for a quick tutorial. As a way to motivate students even more, find an area in your classroom where student work will be displayed. I've included a few examples! Step 3: Let's draw a great story!Once students have finished making their perler design of the main character, they will tell their story a second way. That second way is via storyboards and it can produce some incredible work from your students! Again, make sure students understand that they will not start this step till they have finished the previous work. Here's what I did if you want something sneaky: once the perler is completed, create a new google classroom for them to join and only give them the access code when they have reached this step. It will get other students wondering how they got there and what are they up to. The thing they will be up to is watching a video from Pixar on storyboarding, which is included below. Once they have watched it, give them blank pieces of white paper to bring their story to life. I've included an example below for reference. Encourage students to draw with pencil and then color the pages to add even more polish! Step 4: Let's have the students tell their story!Once students have finished drawing their storyboards and it tells the story that they wrote, have them digitize the pages so that they can create a slideshow presentation. Make sure the students understand that this them pitching their game idea to the class, so when scanning or taking pictures they need to make sure it is easy to see. Also, they should make sure to crop out any fingers or people that may be caught in the photos. Once this is done, have students present the story to their game and have them take questions from the crowd! Step 5: Let's make a game!Once students have presented their story, they are ready to move on to the last step. The students will use the Bloxels app to create their game from scratch. They will build everything from the ground up, including the main character, enemies, level layout, level appearance and will even program their enemies using the Bloxels board. You can download the app for free and it is available on IOS and Android. I've included some tutorials below that will help you get started and they are from the Bloxels youtube channel where you can find even more help! Just as a side note, while the tutorials show how to complete each action with the Bloxels board, the board is only absolutely needed to give enemies brains. The brains are when students will program the enemies to have specific attributes and the Bloxels board is needed for that.
Step 6: Share it out!The final step is for students to present their games. In the past when I have done this, I have moved the desk so that they are facing outwards and students sit at their desk. While there, they have their Chrombook running their presentation on a loop and have their tablet ready to go. This leads to a lot of discussions from visiting classrooms. Yes, again you will want to have other classes visit your class to try out the games. This will give your students another opportunity to practice their public speaking skills and challenge to explain their thought process while working on this project. Along with the games on display, have as many essays, perler designs and storyboards posted on the wall that you can fit or were finished. I've included a video below showing how this project went last year! Some food for thoughtThis is a great follow up to the cardboard arcade game project and really pushes forward the creativity and the idea that students should be given open ended questions. You will have some students that will find this very difficult, especially if they have never been challenged to create something on their own. Some of these students may be your top students and that is a really good thing! Challenge them now so that as they move forward, they will be more willing to take on anything that comes their way. There should be a timetable for this project and students should meet deadlines but also adjust as needed if students as a whole appear to be struggling with a specific concept. Please leave a comment below and if you do this project, please share it with me!
1 Comment
3/4/2024 06:58:10 am
Animation software allows users to create moving images from static graphics or visual elements. It offers tools for designing, editing, and manipulating animations, enabling users to produce various forms of animated content for entertainment, education, or professional purposes.
Reply
Leave a Reply. |
About me
Hi! My name is Jesus Huerta and I help kids find their creativity by making things! Tech comes second and all that jazz. Contact me with ANY questions at [email protected] Archives
April 2019
Categories |


 RSS Feed
