|
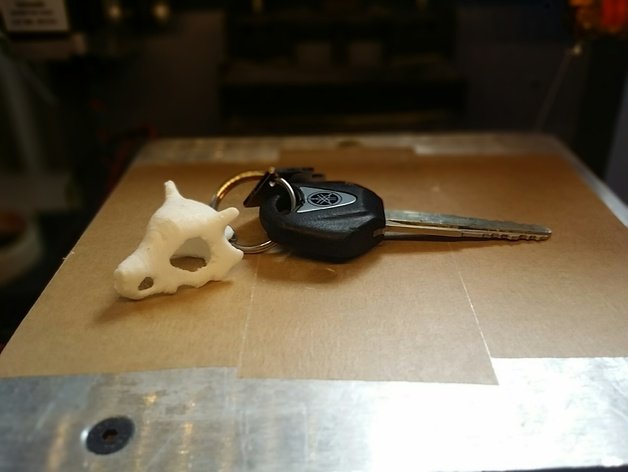
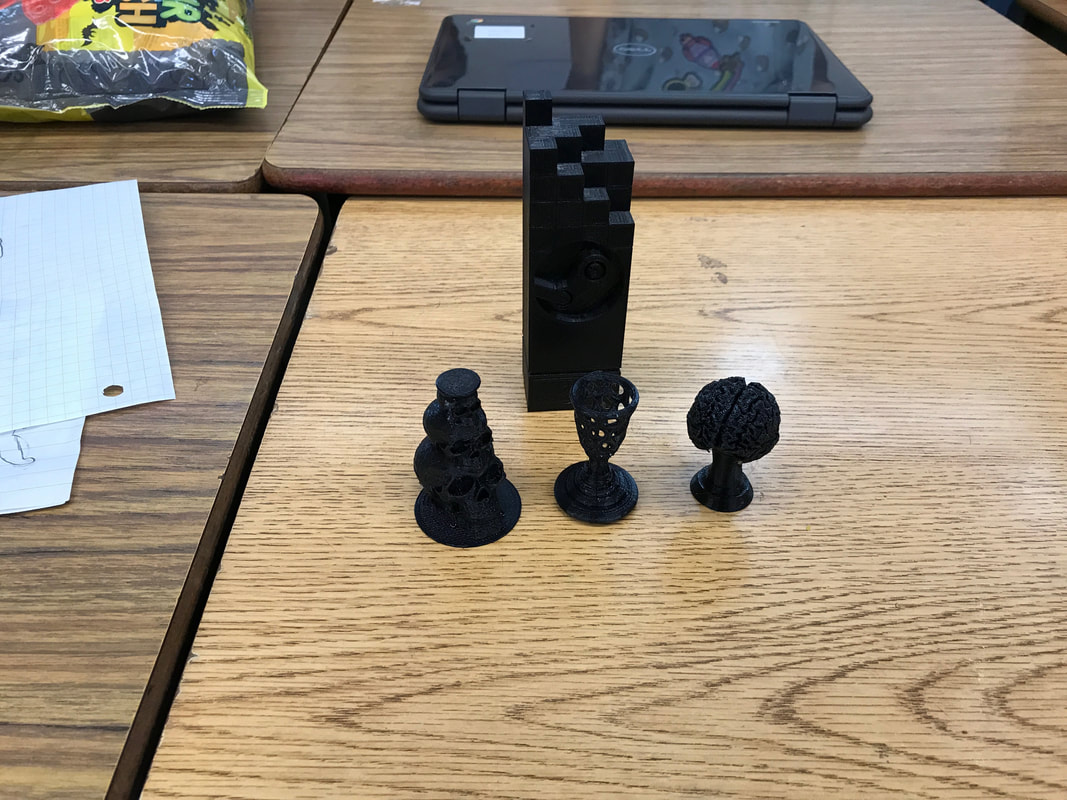
Before starting with this project, please refer to any of my tutorials that have to do with 3D printing. They are a good jumping point and can be located here, here, here and here! That will help you get started and below I'll mention some other printers that are great and affordable! First let's talk about why this project should be done. What is the goal of this project?With 3D printing, students can print amazing things! At first they will most likely print little trinkets such as the ones below: What if we push this further and have them print something functional? What if it's something that not just works but can make a huge impact in someone's life? Let's talk about printing prosthetic hands!
1 Comment
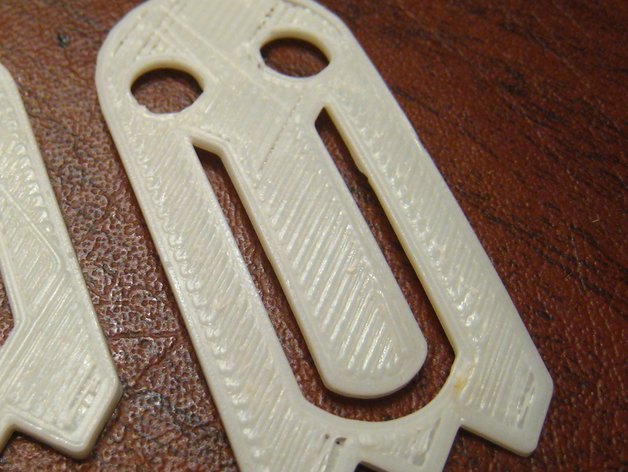
When we do something for our students, it makes a lasting impact. Whether we attend one of their sports games, talk about a movie they have seen or give them a trinket, it helps make that connection so much stronger. Here's a way to make that impact plus show them that reading matters: 3D print bookmarks for your students! Bookmarks that have already been designedIn the previous post, I mentioned how to start the year off with student names tag/plates that were 3D printed. That post also shows how to get started with 3D printing, so please see that page on how to get started. In this post we will look at how to 3D print a bookmark, then how to take an existing bookmark and manipulate it as a custom bookmark. Let's get started! Where to find bookmarks?The place you will want to start is a website called Thingiverse and the link below already has the search completed for you. Click it!
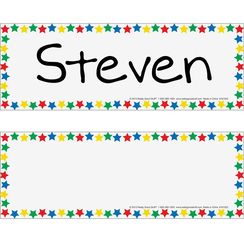
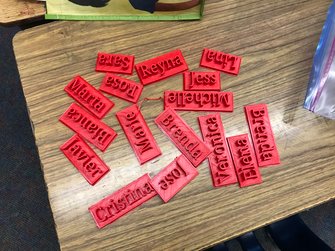
Name plates for the first day of school Usually when we greet our students the first day of school, we ask them to find their desks and they are greeted by these: What if instead, we greeted them with these: While this may take much, much longer than writing names or having the student decorate their own name tags, there are many hidden benefits to creating 3D printed name tags. You will create a sense of wonder by giving your students something they can hold in their hands, created specifically for them and that they can take home to mom and dad. You will also build curiosity in your classroom because the first thing students will ask is how did you do this or if THEY have a 3D printer in the classroom. This is huge and will lead to conversations about what else can be created. You can then build off of this by showing videos related to 3D printing, having other items to pass around the class and having the 3D printer running when students walk in the first day of class. From this simple gesture you will be able to leap frog into design challenges, incorporating 3D printing with projects and so much more. Here’s what you will need to get started: 3D printer Filament Card reader Windows or Mac computer Simplify 3D Which printer do I use? Having a 3D printer (or more, but I’ll address this later) doesn’t mean it has to break your bank. You can start printing in your classroom for less than $400! While searching for 3D printers, you may see some that are able to print bigger or have extra options but you won’t need anything too high end for an elementary classroom. I use the Monoprice V2, it runs for $189 and comes out of the box ready to go. The only thing you need to do is attach the side arm where the filament will be hung and remove the white packing tape one some of the components. In school we want to push out students that will become the leaders of the future. We want to have the next doctor, lawyer, nurse, engineer and more be a student that comes back to us and says we guided them to their passion. As our world changes, then our view on how we guide our students needs to change as well. Technology has changed so much in the last 20 years and the next 5 will introduce tools that will allow items we envision to become reality. It's because of this that we need to create opportunities for our students to see, use and create with these tools. For this post I will focus on technology that is near and dear to my heart, 3D printing! In the future I will focus on other types of technology I use in the classroom, so please keep coming back to check those out! 3D printing and how it is changing everythingTaking our names and making it into a key chain may seem like a small deal but it's where we begin to grab our students attention. If we want to hook students onto science, we have them do experiments. We don't ask them to build a nuclear reactor the for their first experiment, instead we have them try something simple and make observations. The same can be said about 3D printing, which can lead to some "simple" mistakes that will create a lot of "AHA" moments for students. It's from this simplicity that we hook students and that can lead them to careers where they do the following...
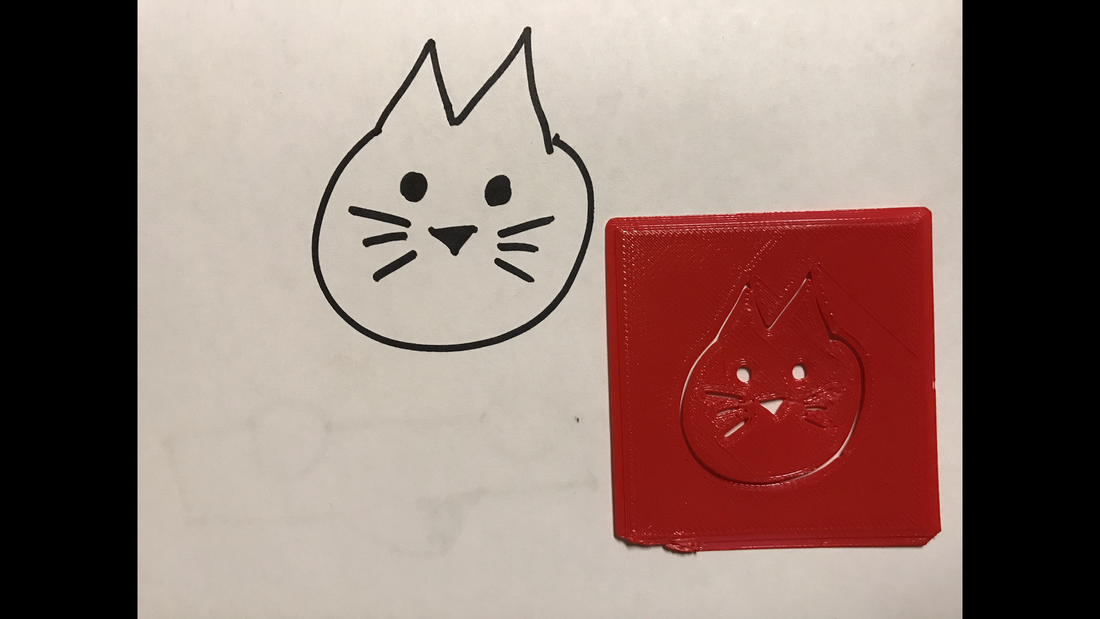
In a previous post I covered how to make a stencil out of silhouettes but now lets take a look at how to make a stencil out of pretty much any drawing, including hand drawn creations from your kiddos!
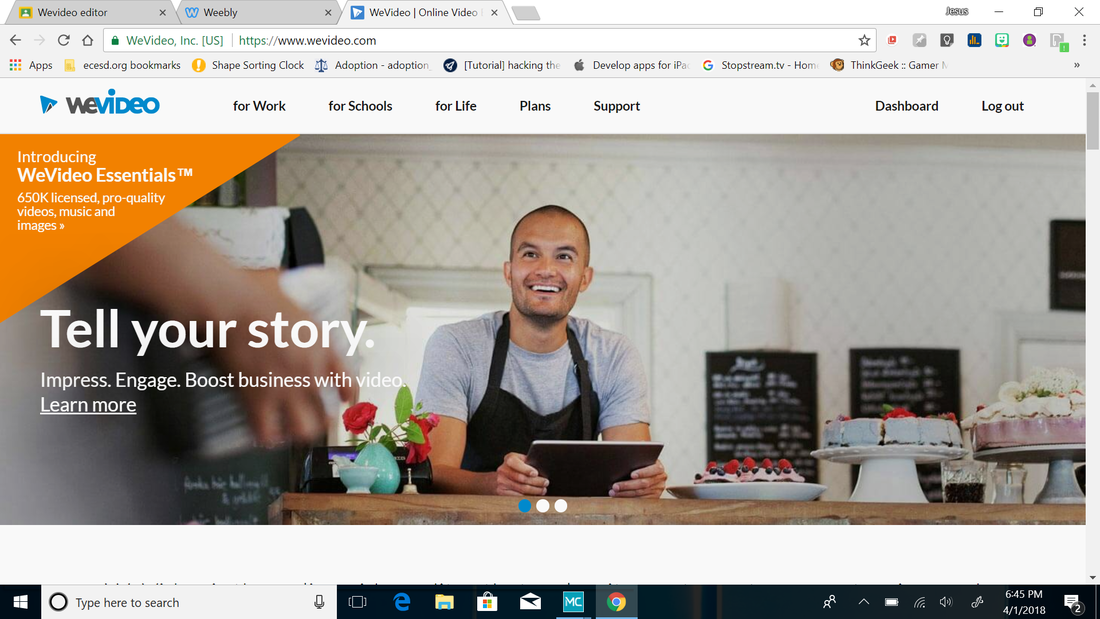
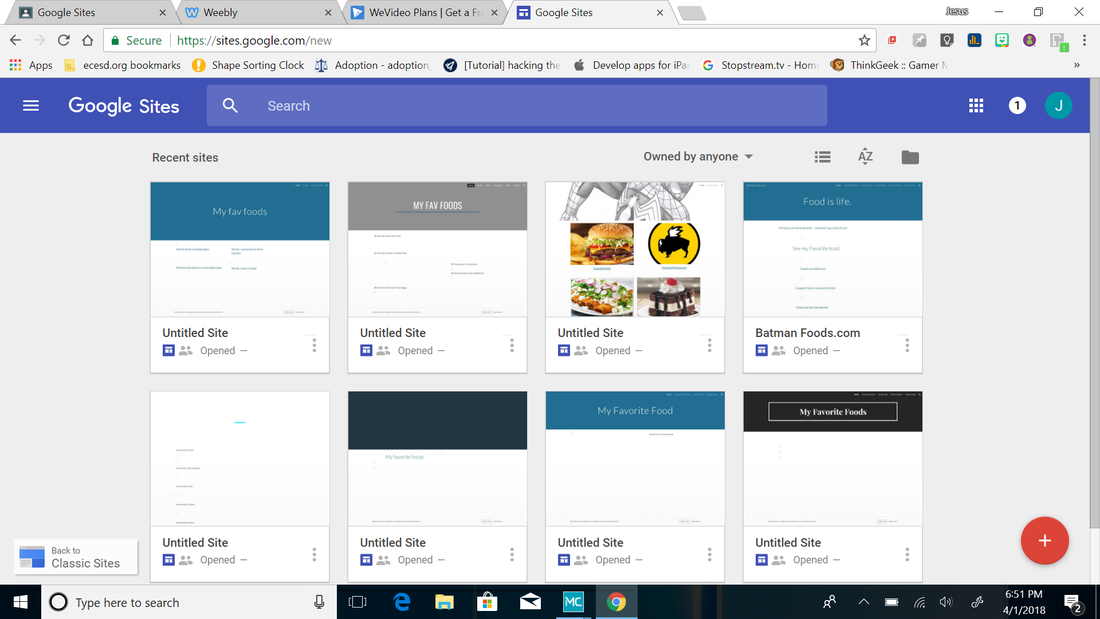
Student voice and student choice sound amazing but what does that mean exactly? Student choice should be where students decide what they learn but also should be for them to decide how they present what they have learned. Here are a few choices that allow students to express themselves in different ways and with a brief overview. I'll cover these in more detail in the next few days or you can email me at [email protected] and we can get the ball rolling! WeVideoAn online based video editor that works great with Chromebooks, WeVideo can be upgraded annually to allow students access to all the bells and whistles. It can be upgraded to 34 seats or more for a little more than $200. If that is too much for your school or district, don't worry because students can keep a free account forever! It will limit their recording time but can be used over and over as long as projects are deleted. Students can present their understanding by recording video, doing a voice over or as a compliment to a live demonstration. Google SitesWith a new interface and more streamlined than before, Google sites will allow students to create a website by dragging and dropping components. They can create new pages, link from page to page, embed media and more. Students can link ideas that are interconnected via web pages and for some students this may be an easier option than to just type out an essay. Click the link below to go the new Google sites page.
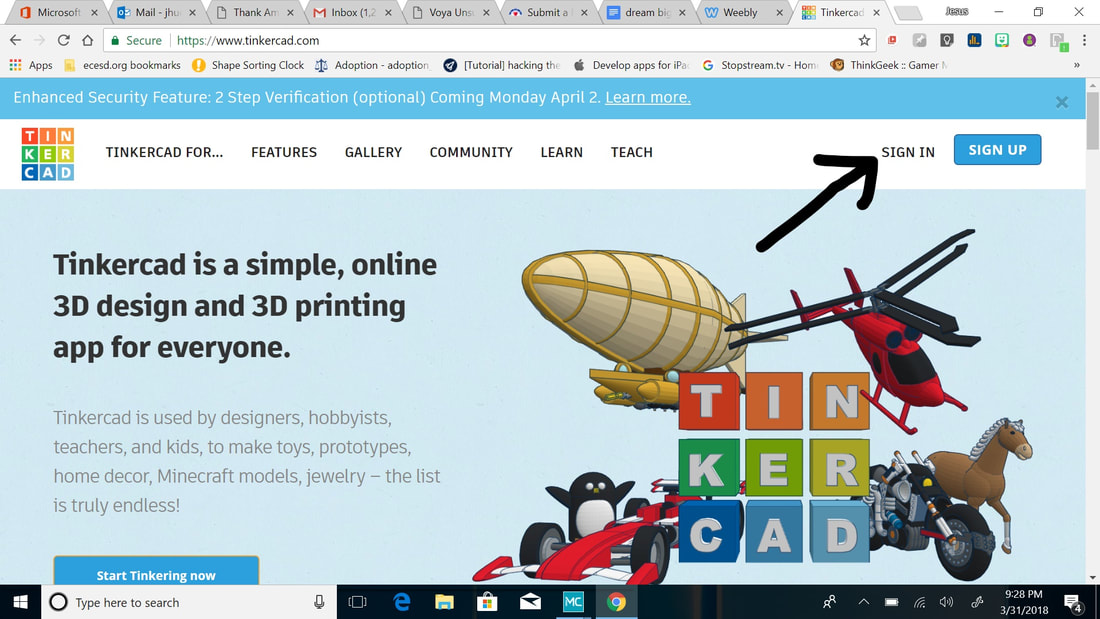
Have you heard of Arduinos, but don't know what all the fuss is about? Maybe you have but can't find a way to scale them affordably to your class? Well, you're in luck because now you can try it out with your whole class and all you need is to be able to go online! Wait, isn't Tinkercad just for 3D design?Yes, it's great to get started with 3D design but you can also access a virtual Arduino here also! Let's quickly go through the login process for students that have Google accounts. Click on sign in
I have something to admit, I love drawing! I just don't have enough time to do so. Something that I also have to admit is that I love blending technology with artwork. Here is a quick and easy way to have students combine the two, with your students getting to be creative along the way! You'll need a couple of things to begin with.Obviously you'll need a 3D printer, so if you have one then you are off to a great start! If you don't and have questions on where to start, please feel free to contact me, my email is to the right! You'll also need a piece of software that requires an add-on and also a Crayola sprayer. Click on the links below to get both.
3D printing is something many teachers want to try but may be afraid to take the plunge. Let's take a look at a solid 3d printer and a quick activity to get students started! Which printer should you go with?This really depends on your level of expertise but you can start with a printer that is under $300 and is very user friendly. Right now my go to printer is the Monoprice Select Mini and $229 shipped, it will not make the same dent financially as other printers.
Project: HANDSSo this last project is very ambitious but also one that I believe is incredibly beneficial for students. It will help them to understand that the technology available to them at this time can allow for problem solving, creative thinking and that they can help those in need. Specifically, helping those that are in need of prosthetics that cannot afford them. This is the last of my big 3 projects and it will be my first year doing it. Let me share what I have learned so far and how to get started. This will take time...Before getting started, there a few things to realize. The first is that students should have exposure to playing with 3D design tools. The easiest and least expensive of these is Tinkercad. This website is actually powerful 3D design software that is browser based and will work with Chromebooks. I mention this because a lot of schools have moved towards using Chromebooks as their 1:1 tool. Click the image below to launch the site. Begin by having students play with the software. Then push them by having them design specific items, such as keychains, rings, mugs etc. from scratch. When the time comes for them to redesign the final part of the project, it will come easy to many of them.
So one of my things for this year is to blog more often, specifically at least once a week. A lot of what I blog has to do with instruction or tutorials. That will mainly be my focus throughout the year but I do want to start sharing my thoughts and ideas when it comes to the profession. So when it came time to choose a #oneword for 2018, I wanted to make sure I sat down and wrote up a piece on it to explain why I chose BOLD. Bold: take risks, be confident and courageousMy word that I want to define this year is something that I want to be a staple for the rest of my teaching career and something that I have tried to be for the last three years. Being bold is taking risks, yes. It also means to be confident and courageous, which only happens if I really understand the risks I am taking. If you have or haven't seen my other blog posts, let me explain what makes my class a little different. I have incorporated technology heavily into, to the point where I set aside a chunk of time daily for students to explore technology and just technology. Is there a risk in doing this? Yes, but the payoff is incredible. Will it require me to learn about every item I will hand to my students? Yes, but their reactions are priceless. Will this blow up in my face? It can, it will and if it does it just means that I need to refine my process. The other positive from failing is that I can show my students how we get back up, adjust and go at it again. What risks do I want to take this year?In order to continue with this BOLD mindset, I need to keep pushing what I learn so then I can pass that on to my students. I can't stop learning about new technology or methods of teaching because my students are successful. I want to keep them on their toes and that will require for me to be constantly learning. Below are some of the items I want to tackle this year and each will require time, effort and a risk of failing.
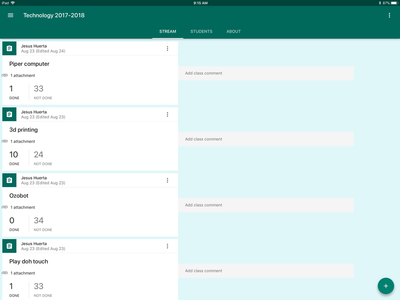
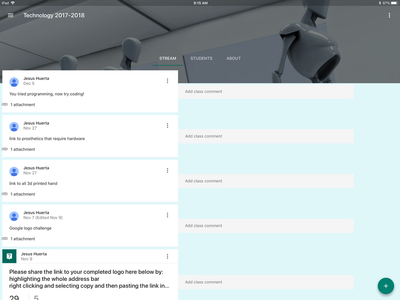
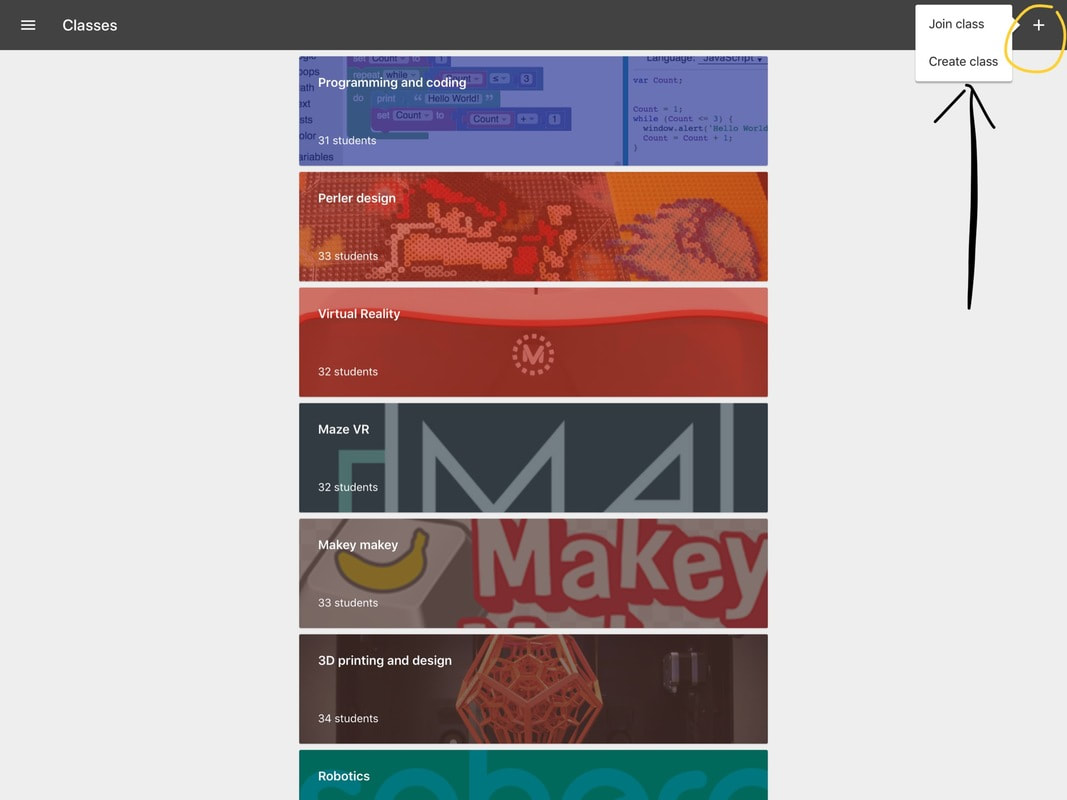
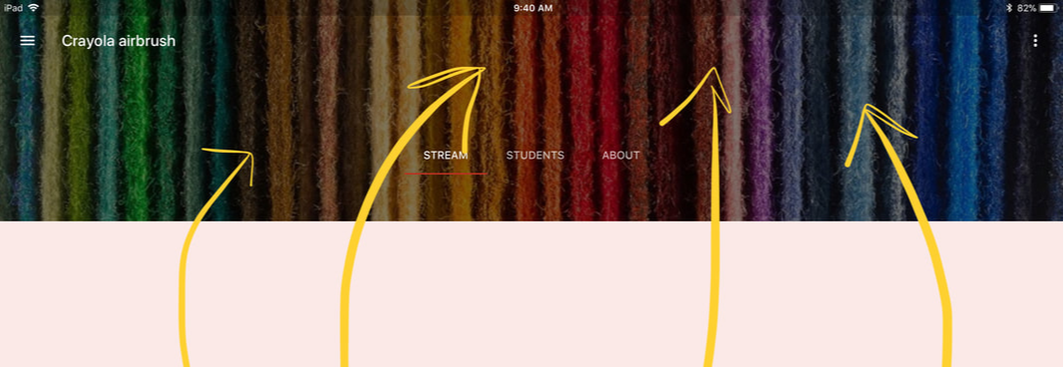
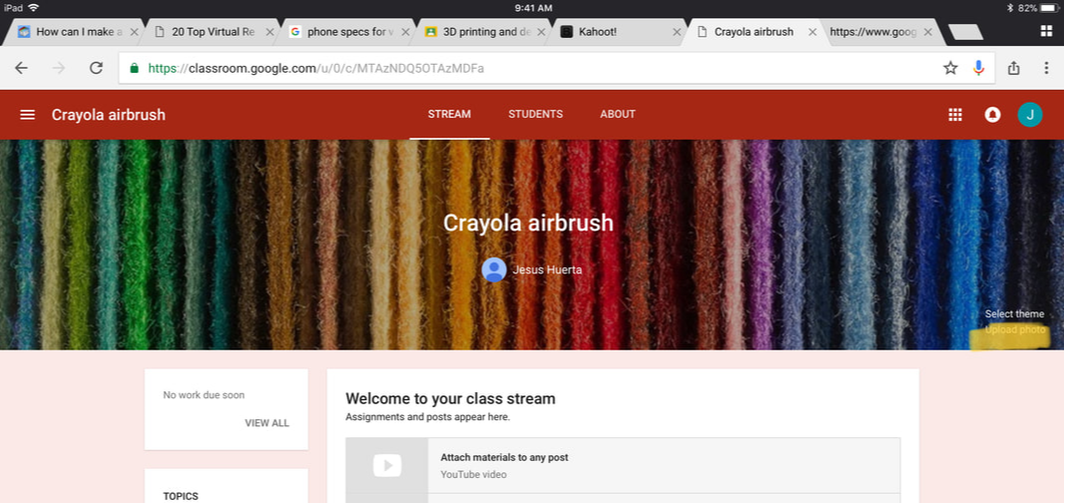
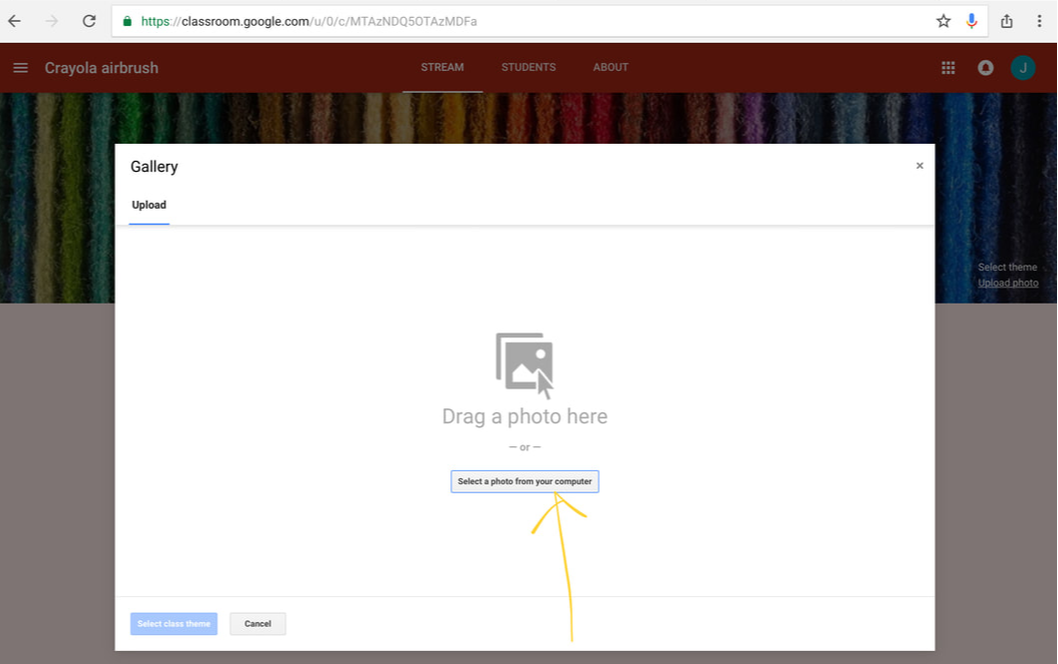
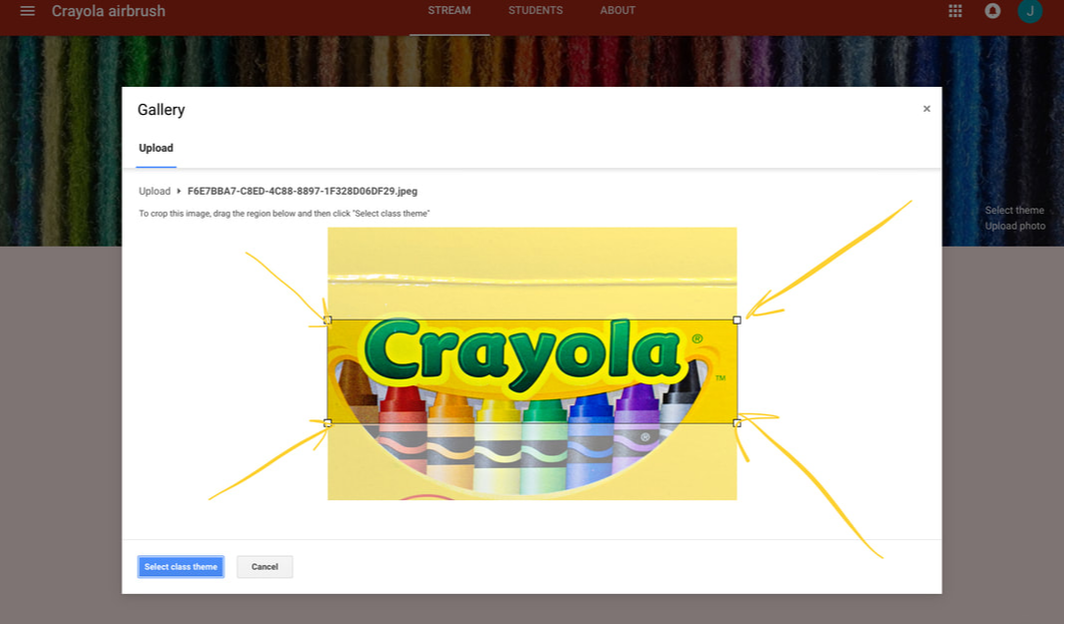
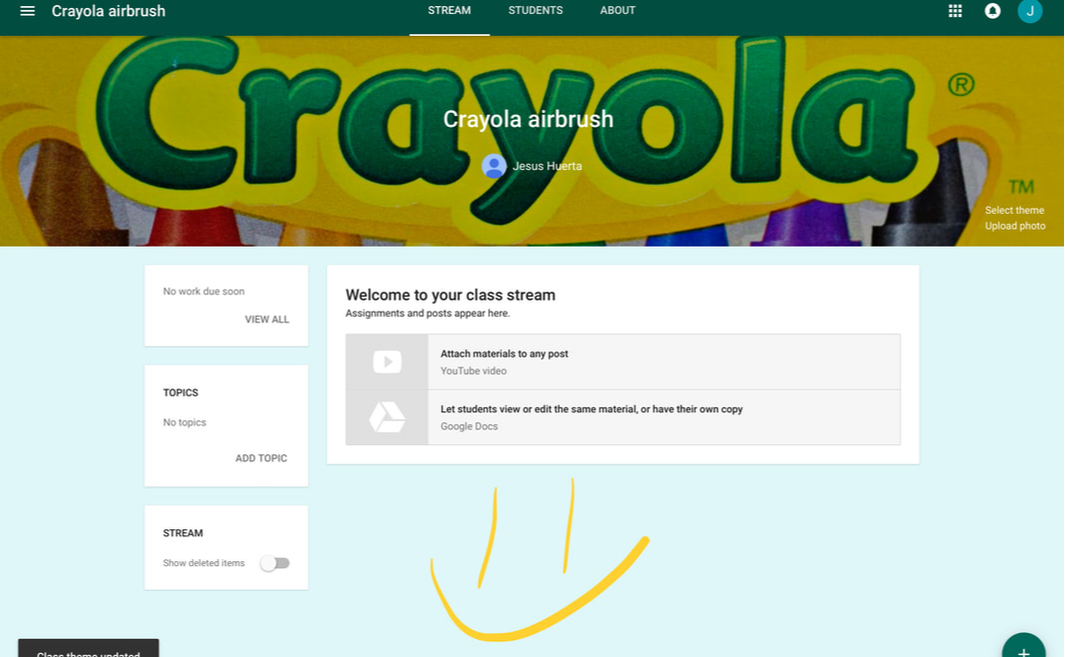
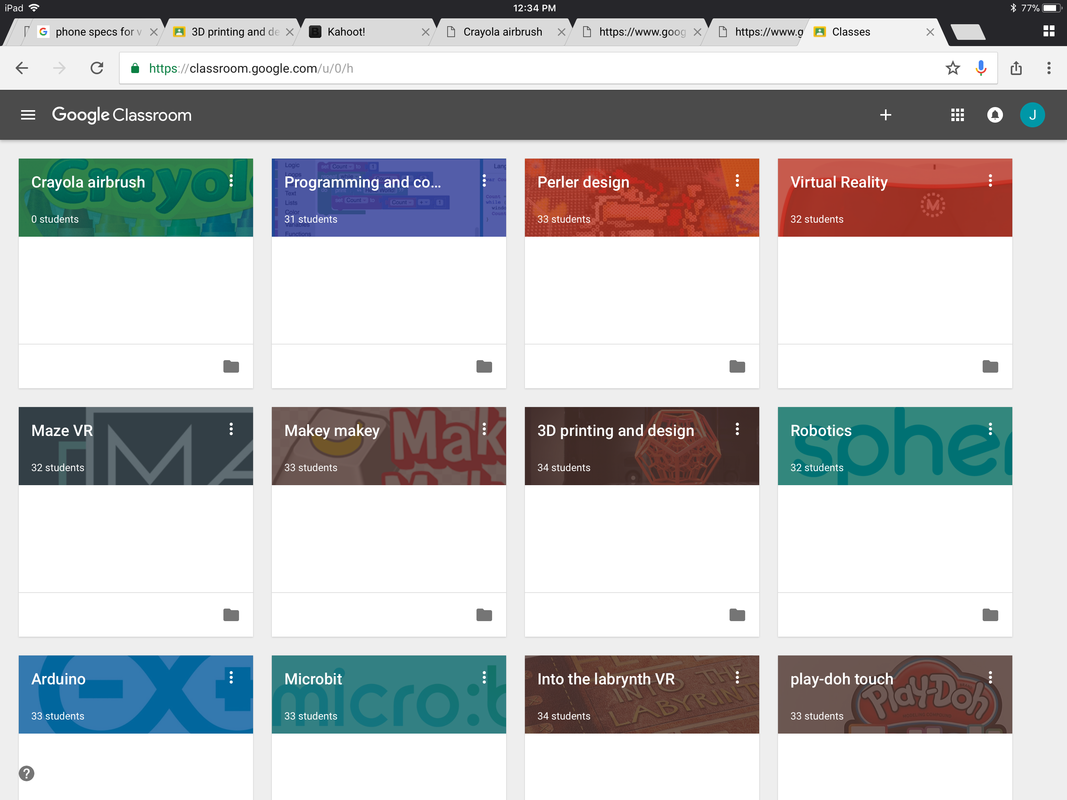
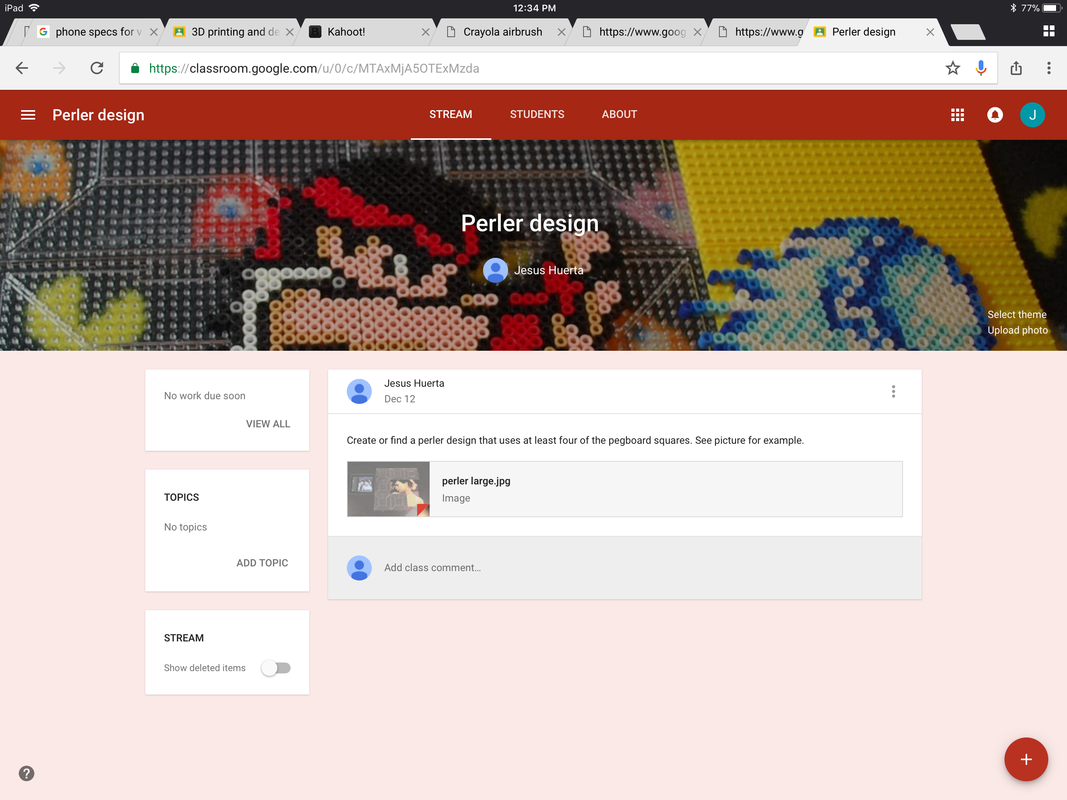
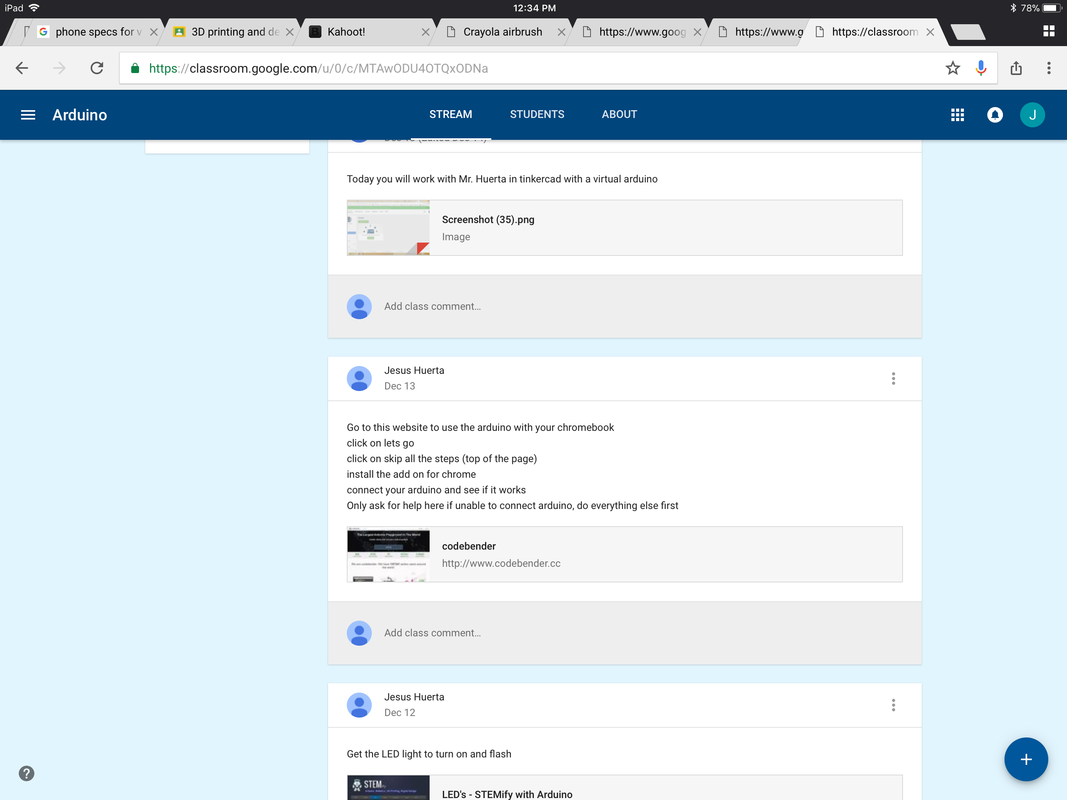
1) Take the time to complete my Google certification level 2 and then apply to be a Google innovator 2) Find more technology for my classroom so that I can send my students to 7th grade as experts in many different types, i.e. robotics, 3d printing and so on. 3) Keep refining everything I do and not settle for what works, I want to always ask myself "How can that run even smoother?". I want to apply this to my classroom, any sessions I do for conferences and everything in between. 4)Blog weekly, podcast weekly, push some form of media out there weekly! In previous blog posts I mentioned my take on classic station rotation but instead of focusing on small groups with ELA or math skills, I have students work solely on technology. I used hyperdocs with my students to get them started with each piece of technology, but I was using only one classroom and that became a big problem. One classroom for several stations...not a good idea!So we have thirteen technology stations we use: Snapcircuits, Piper computer, Play-doh touch, Into the Labyrinth VR, Microbit, Arduino, Robotics, 3D print and design, Makey Makey, Maze VR, Bloxels, Perler art and Crayola Airbrush. It's a lot and the mistake I was making was putting everything into one classroom! As you can see above, students were going in, getting lost and not sure where to go. That would kill the flow and excitement of our daily technology time. So what is a better way? Making a classroom solely for each station in Google Classroom! Quick overview on how to create classrooms!Click on each of the pictures below to see how to create your classrooms Go the classes area of Google Classroom and click the plus sign. This will open up a small menu and there you will choose the create class option. Here you will need to name the class and optionally to select the section. For this example I am creating the Crayola Airbrush classroom From here you will want to click on students to get the class code Here is the code you will use to give students access to the classroom Now lets do something about this generic background! Here you will change the back ground to something that ties into your classroom. Click on the highlighted area to upload a picture! Here you will click to upload a photo from your computer, so make sure you have one ready! Select the photo and then use the squares to crop and size it! Awesome! All set! Here is how the classrooms make it easier for students to navigate!So once all the station classes are made you have something like what is below. Way easier to look at, way easier to navigate and also easier on the teacher to insert instructions/assignments. Here is the Perler classroom with a set of instructions that will work for a whole week. Kids check and nothing new is there so they continue with the assignment. It also helps them to understand when to ask what's next. On the side, we have a classroom that has something changing almost daily. In the Arduino classroom, students will see instructions that may reference other posts from the same or previous day. Take aways and final thoughts...This allows students to be even more independent and really allows for teachers to facilitate. Students open their computer, check if there are any updates and then go from there. If students ask what to do when they finish a step, the teacher can refer back to the classroom. Eventually it becomes automatic and can allow for more time with exploring technology.
Here is the second of three projects to get students motivated and also get them thinking in new and exciting ways! The Bloxels game projectThis project is quite a few steps up from the previous one, the cardboard arcade game project. It will push your students to think in ways that will push them out of their comfort zone and guess what? That is great! For this project you will want to stress the idea of managing time, meeting a deadline and instead of groups, the students will work alone. Also, students will tell their story in three different ways and this will allow them to see that they can show what they know in other ways than just the written word. This is especially important for those students who may have difficulty expressing themselves via written word or even orally. Step 1: Let's write a story!Start off by telling students that they will write the backstory to a video game they will create. Don't hide what the endgame will be and instead express how this will be their story to tell, develop and create as something interactive at the end. Depending on the grade you are teaching, have them write a minimum that works with their content standards. For example, with 5th and 6th grade I made sure to have them write a 5 paragraph narrative essay. If you are working with younger students, please make sure to modify as needed. One last thing, don't let students move on to the next step till the story has been read by other students, revised and submitted. Give it a quick read and give the okay or have students go back and work on it till the story is more fleshed out. Below I've made a list of things to make sure you hit upon so students understand what is expected and also allows for you to avoid any headaches.
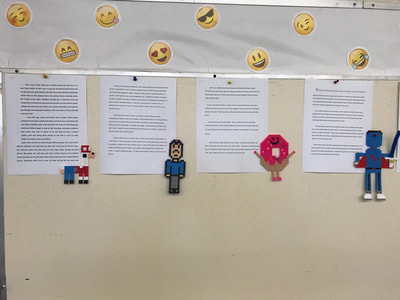
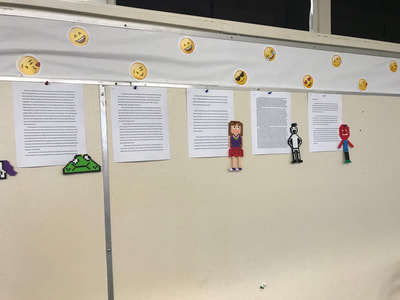
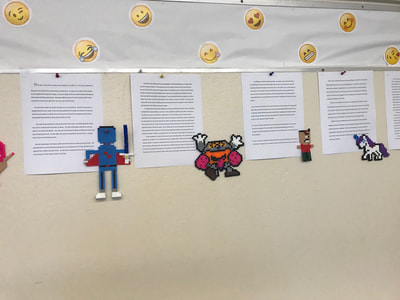
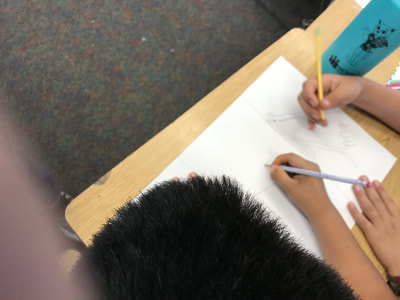
Step 2: Have the main character come to life!Here's a chance to "sneak" in some art, which can be difficult to do at times. Using graphing paper, have students create an 8-bit representation of their main character. Here are some examples of 8-bit graphics just in case you want to double check what it looks like or share with students. Some students will try and draw their character using round lines as if it were the usual blank piece of paper. No need to redirect and for these students it will be a great teachable moment. Once students have drawn their character, students will bring their characters to life using perler beads and perler boards. Click on any of the following links to purchase supplies at Amazon, Walmart, Michaels and Joanns (by the way, Joanns usually has them on sale and they stack their coupons!) Once students have finished their perler, make sure you iron it for them! Need help with how to iron perlers? Look below for a quick tutorial. As a way to motivate students even more, find an area in your classroom where student work will be displayed. I've included a few examples! Step 3: Let's draw a great story!Once students have finished making their perler design of the main character, they will tell their story a second way. That second way is via storyboards and it can produce some incredible work from your students! Again, make sure students understand that they will not start this step till they have finished the previous work. Here's what I did if you want something sneaky: once the perler is completed, create a new google classroom for them to join and only give them the access code when they have reached this step. It will get other students wondering how they got there and what are they up to. The thing they will be up to is watching a video from Pixar on storyboarding, which is included below. Once they have watched it, give them blank pieces of white paper to bring their story to life. I've included an example below for reference. Encourage students to draw with pencil and then color the pages to add even more polish! Step 4: Let's have the students tell their story!Once students have finished drawing their storyboards and it tells the story that they wrote, have them digitize the pages so that they can create a slideshow presentation. Make sure the students understand that this them pitching their game idea to the class, so when scanning or taking pictures they need to make sure it is easy to see. Also, they should make sure to crop out any fingers or people that may be caught in the photos. Once this is done, have students present the story to their game and have them take questions from the crowd! Step 5: Let's make a game!Once students have presented their story, they are ready to move on to the last step. The students will use the Bloxels app to create their game from scratch. They will build everything from the ground up, including the main character, enemies, level layout, level appearance and will even program their enemies using the Bloxels board. You can download the app for free and it is available on IOS and Android. I've included some tutorials below that will help you get started and they are from the Bloxels youtube channel where you can find even more help! Just as a side note, while the tutorials show how to complete each action with the Bloxels board, the board is only absolutely needed to give enemies brains. The brains are when students will program the enemies to have specific attributes and the Bloxels board is needed for that.
Step 6: Share it out!The final step is for students to present their games. In the past when I have done this, I have moved the desk so that they are facing outwards and students sit at their desk. While there, they have their Chrombook running their presentation on a loop and have their tablet ready to go. This leads to a lot of discussions from visiting classrooms. Yes, again you will want to have other classes visit your class to try out the games. This will give your students another opportunity to practice their public speaking skills and challenge to explain their thought process while working on this project. Along with the games on display, have as many essays, perler designs and storyboards posted on the wall that you can fit or were finished. I've included a video below showing how this project went last year! Some food for thoughtThis is a great follow up to the cardboard arcade game project and really pushes forward the creativity and the idea that students should be given open ended questions. You will have some students that will find this very difficult, especially if they have never been challenged to create something on their own. Some of these students may be your top students and that is a really good thing! Challenge them now so that as they move forward, they will be more willing to take on anything that comes their way. There should be a timetable for this project and students should meet deadlines but also adjust as needed if students as a whole appear to be struggling with a specific concept. Please leave a comment below and if you do this project, please share it with me!
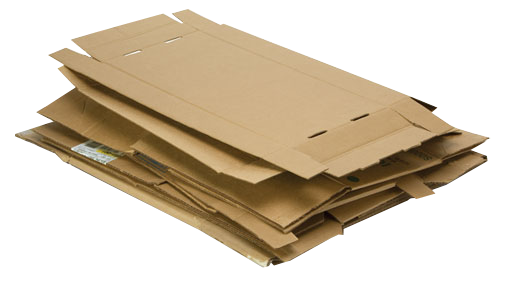
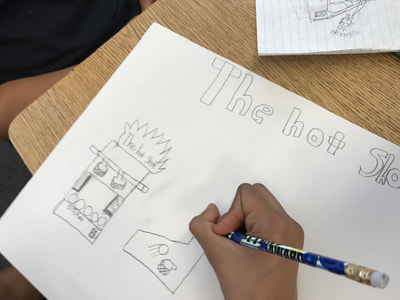
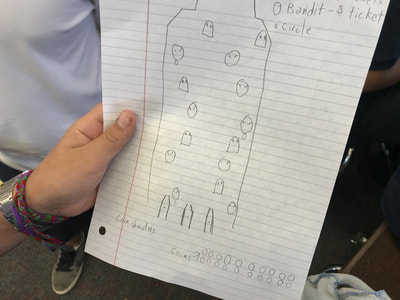
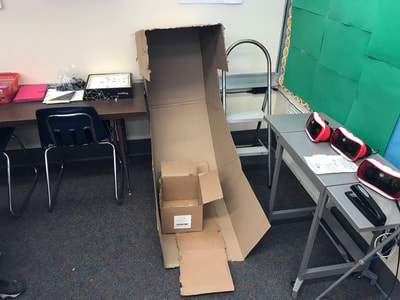
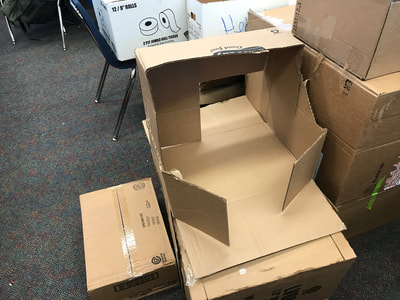
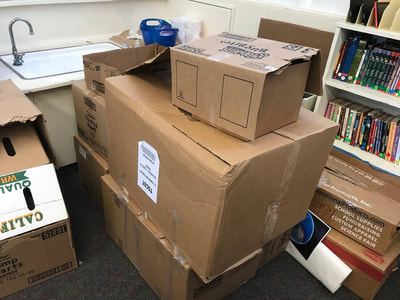
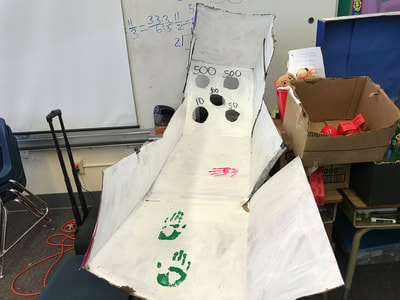
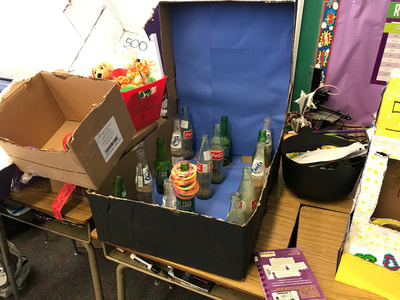
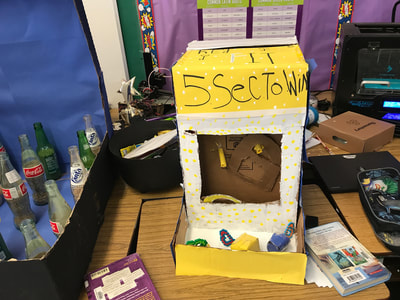
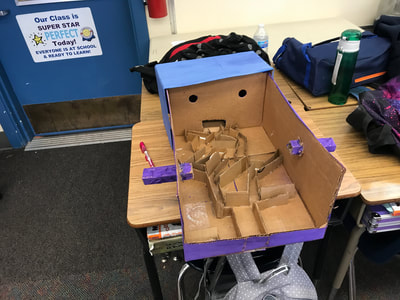
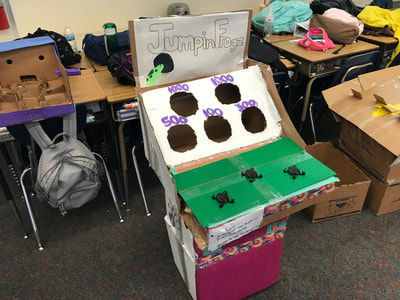
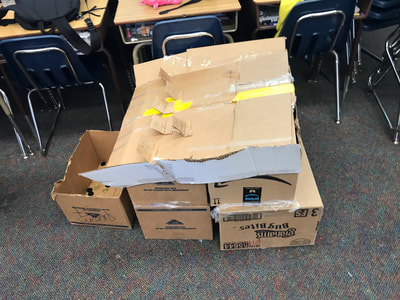
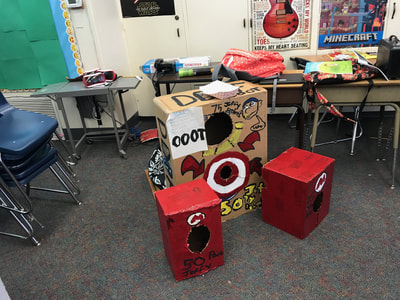
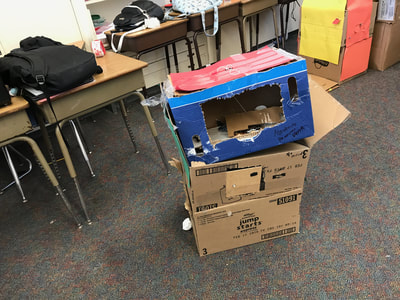
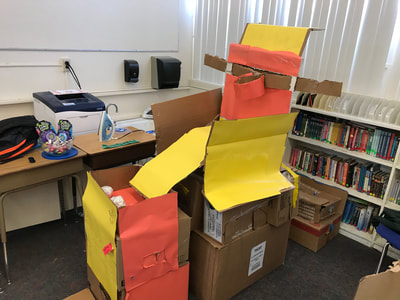
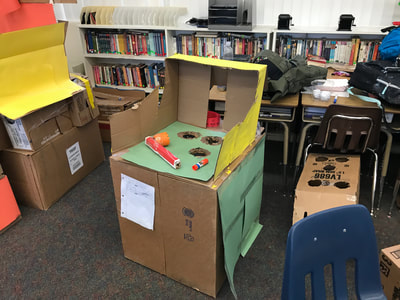
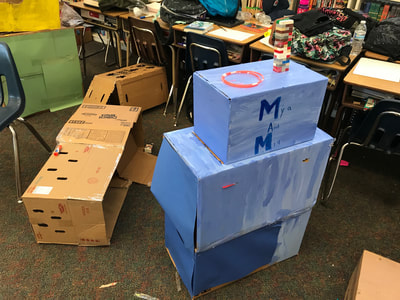
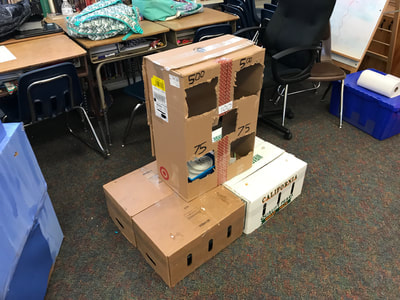
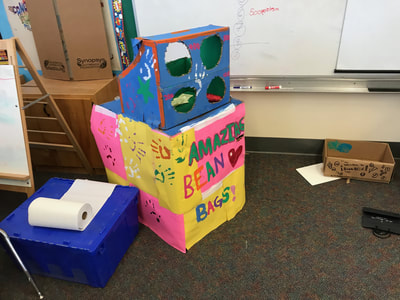
Below you'll see 3 great projects that will help your classroom get a jump start in creativity, teamwork, time management and more! I've listed them based on levels of difficulty. The cardboard arcade game projectStep 1: Collect lots of cardboard! First thing you need to do is grab lots of cardboard! Ask the cafeteria staff to hold it for you and this part will be a breeze! Next, you'll want to break the boxes down so you lay them flat and stack them neatly! BONUS: put the cardboard stack in plain site for a couple of days and the students will start wondering what it's for, but don't tell them! Step 2: Show this video Show this video about Caine's Arcade to get the students interested. Don't tell them yet what they will be doing the same and some may figure it out once the video starts but be ready for students to get interested in this video. Once the video is over, have a discussion with the students and ask great questions. Step 3: Create teams Here is where you will need to hold back the feeling to let kids cut up cardboard and all that good stuff! Instead, have them come up with 2-3 member teams. Next have them come up a team name. Now the kicker: have them choose the captain/team leader or you choose. This is where the project takes shape and begins to challenge students. Those that are afraid to lead may be the perfect choice. The students that can't follow may have a hard time listening to other's ideas may be a great choice also. These leaders will decide who does what and make final decisions. Step 4: Rough draft blue prints and then final version Here is where students will start creating! Make sure all students are working, interacting and involved in the brainstorming process. Use regular sheets of paper for the rough drafts. This will require lots of facilitating, walking around and listening to conversations. This may be something new to you but that's okay, let the kids collaborate and create something awesome! For the final version of their blue prints, make sure they have at least 2 different points of view drawn, list their team name, team members, name of the game and parts/materials needed. In some years I have provided everything and this year I had a lot of students offer to bring tape, parts and materials. Letting them bring in those items gives students a real sense of ownership with their games. Use larger pieces of butcher paper so they have plenty of room for details. Create a blue print of something that you can draw in a couple different points of view as an example and model the information that needs to be on the blue prints. Most importantly: you need to okay their finalized blueprints before they can get any cardboard! This will save you tons of time and headaches! Step 5: Cardboard, how to handle it and handle the mess that comes with it! First thing you need to understand is that your classroom may become messy during this project. It's okay, don't stress out and go with the flow. The end product will be great and use this as a way to push the idea of keeping a neat work space. This will also allow you to push the idea of time management, since the time to work on these games will be limited to a specific amount each day. Some groups may want to take 4 or 5 pieces of cardboard, please don't let them. Instead, let them take one to two pieces at a time and have them prep those pieces as needed. This will help to avoid any conflict with some groups taking too much when it is not needed. It will also help the students to focus on completing certain aspects of their game. Again, you will facilitate, offer tips and so on. I used 30 minutes a day with my class and gave them two weeks to complete their game. Something else you will want to avoid is using scissors. Yes, avoid using them because students will begin having a difficult time cutting the cardboard and may resort to using them as saws. This is dangerous and can lead to cuts, poking and worse. Instead you will want to show students a different method: they need to fold and then tear the cardboard. This is where students will begin to put cardboard pieces together and adhesives will be needed. Here are some good options: Packing tape, glue and hot glue guns. Depending on the age of students, you may want to use only packing tape or Elmers Glue. See below for some great examples of student games as they start to take shape! Step 6: Teach students about deadlines and time management Easily one of the best parts of this project has nothing to do with creativity but instead with a skill that cannot be taught in a textbook. Students will learn responsibility by understanding time constraints that will force them to be on task or produce a game that is not as polished as others. This is an area where some students may have difficulty if they have never been challenged to meet a deadline. Also, to push the idea of maximizing time, don't allow students to stay after to work on their creations or to take stuff home. Stress it to students that the allotted time is to be used wisely and that all the team members need to be active. For me 30 minutes a day is perfect! Step 7: Decorating and finalizing games If students ask to color a part of their game, advise them that the game needs to be finished and playable. By having this goal in place, you can avoid having students paint or color as they are still figuring out how to make the game they designed earlier. This will also help them to understand that if it doesn't work, they will need to go back and make changes. Again, you are the final judge on whether it is done or not. Make sure to let students know that they can't get any paint, butcher paper, etc till you give the okay. Once students have finished, give feedback on their game and allow only minor changes. Below are some examples from this year and I was really impressed! Last step: Invite classes and reflect! The last part of this project is to share what your students have created. I always invite the principal and vice principal first. The next thing I do is invite upper grade classes and have one per day but this may vary depending on how many 4th, 5th and 6th grade classes at your site. As an added bonus, I 3d printed trophies to give to the game that got the most votes from each class that visited. Using slips of paper, have students that are visiting write down the name of their favorite game and reward those that win! See below for some example trophies! Each of the 5 days you have visitors, have students reflect with a one paragraph response to a question or prompt. I like to ask some of the following questions: "What was the most difficult part of this project?" "What would you have done differently?" "What was your favorite part of the project?" Some thoughts...
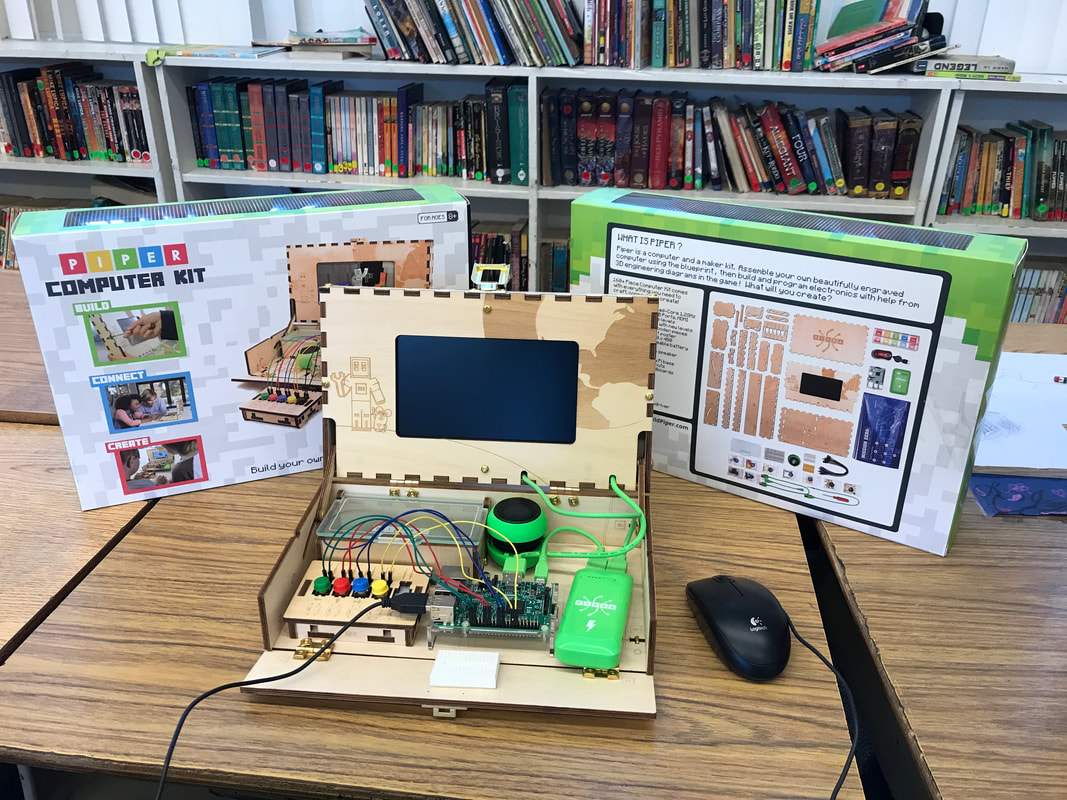
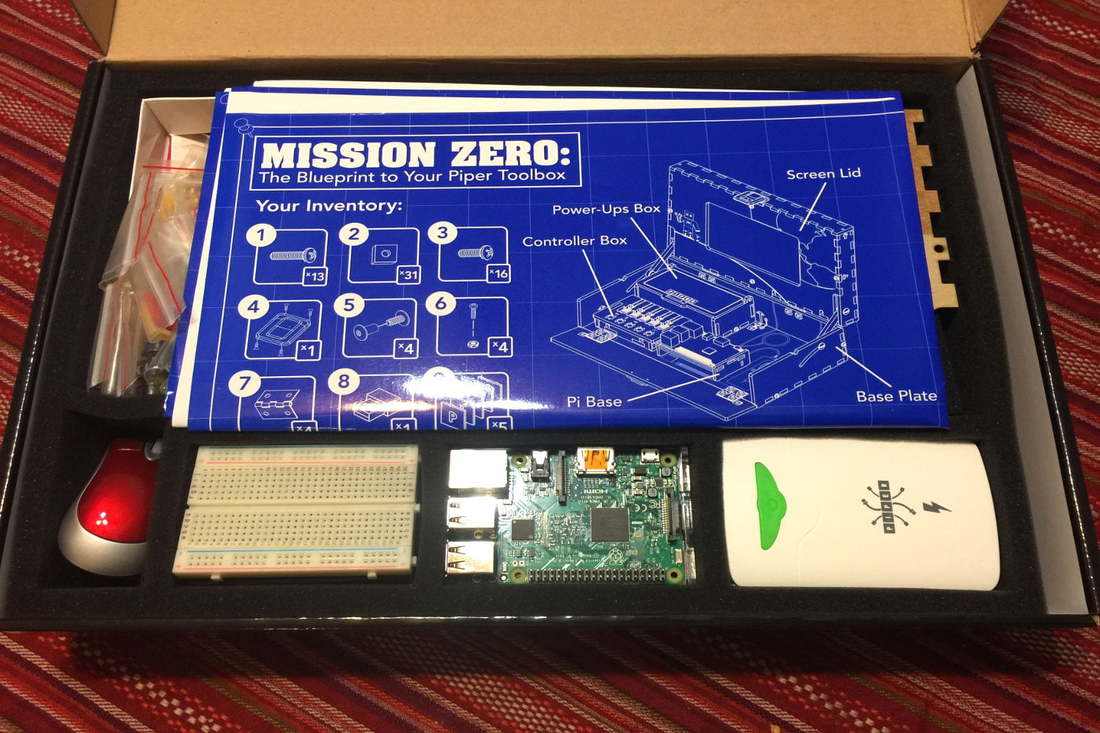
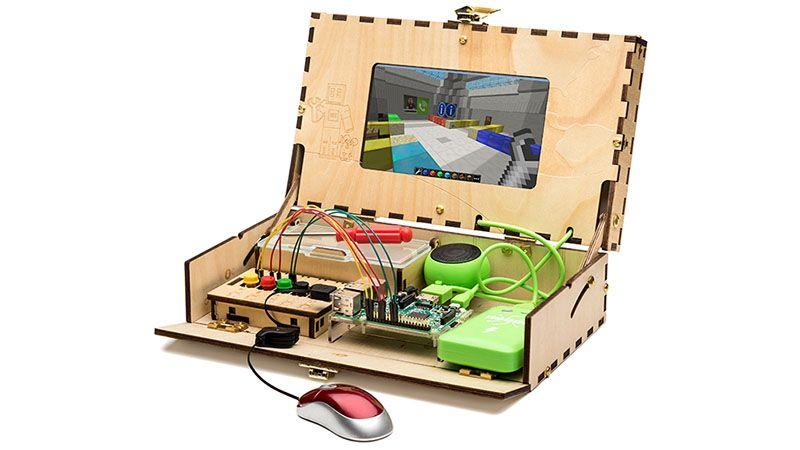
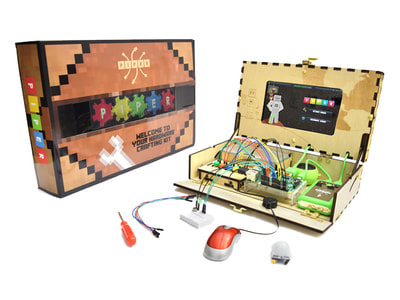
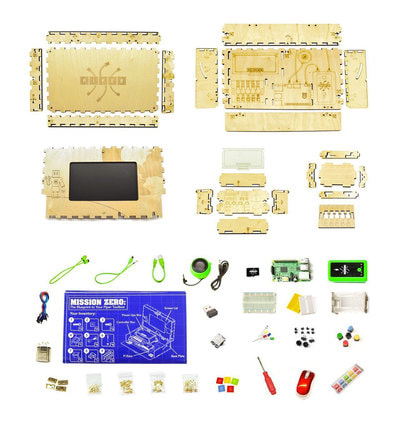
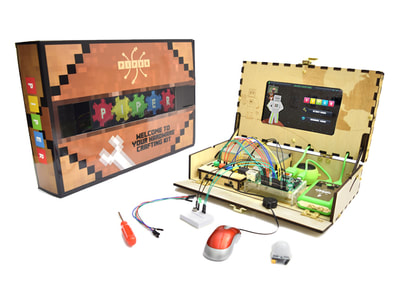
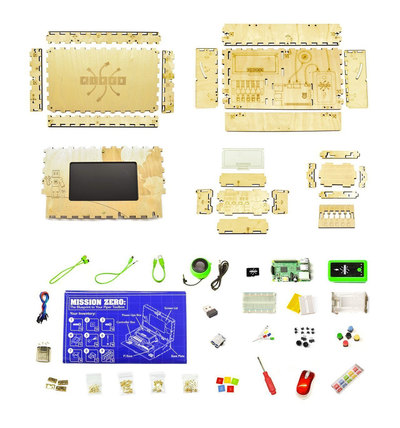
This is a big project in that it takes up a lot of space but also in the areas it addresses for students. Here are things students will learn and extend during this project: Design process Time management Teamwork/collaboration Engineering Public speaking skills Presentation skills Please make this lesson your own and leave a comment on anything you may have a question about. Also, please give it a try and don't quit if you feel like you are losing control during some part of the project. Take a step back and see what is working and not working, then make the necessary changes. It's a great experience for students and the pride they have with their games is one of the best parts of doing this! Over the next few days I would like to focus on each of the tech stations I am currently using. These are each items that focus on technology, creativity, critical thinking, problem solving and/or computer science. For the first station I would like to focus on the Piper computer kit, which starts off as a DIY computer but then becomes something much, much more. DIY=Do It YourselfOne of the first things that will catch students by surprise but also hook them to this station is that they will build the computer piece by piece, wire by wire and more. The piper computer kit comes disassembled, but it includes blueprints that allow student to put it all together. Sounds good, but how will students learn from building this?By having this as a station, ideally with three piper computers, you can have three to six students working together. There's collaboration at it's best. With three students they can start of working alone and with a teacher facilitating, can come to the conclusion that they can help each other. With six students, they can pair up, distribute the work load and figure out where they may need to work together. The communication channels that will open between students, especially for those that have difficulty working with other, is something that is beneficial for all content areas. They put it together, now what?As part of station rotation, you will have the option to keep students on the station after its been built and then disassemble for future students. This will allow for flexibility to keep students at stations a little longer and keep them focused on this particular station. The other option is that one student or a pair of students can put it together, begin working with the Piper program and as rotation continues students will come beginning with the program. The build aspect could be used to motivate a student who is down on technology, school or is just one of those students who needs that extra push. They will begin playing Minecraft, how is that learning?This is where students will actually begin learning about computer science. They will begin learning how circuits work by creating the missing controller needed to move forward in the game. The electronics they are using in real life is represented digitally for them to understand how everything is working. How can I help redirect my students if they get lost?One nice aspect of the Piper computer kit is the unit plan that is readily available. It has a breakdown of all the lessons included. It will help to plan out what students can/should cover during their time on station rotation. It will also allow for teachers to plan out extensions for those students that are able to grasp computer science a little easier than others. Here is the link to a PDF copy of the unit plan: https://drive.google.com/file/d/0Bz0GlPie9TdcaF9PY1ZWRXZlRnM/view?usp=sharing Piper computer kit's strength as part of station rotationTeachers will be able to track how far along students get with the Piper computer kit by tracking which planets they have completed. Also, another method that can be used is via Hyperdocs. I have created a Hyperdoc to get you and your students started. Here is the link to the Hyperdoc: https://drive.google.com/open?id=1Zj-3BX4O134KIGGPT-vsDYJ-qafLirnvPIcQM2ahI4A
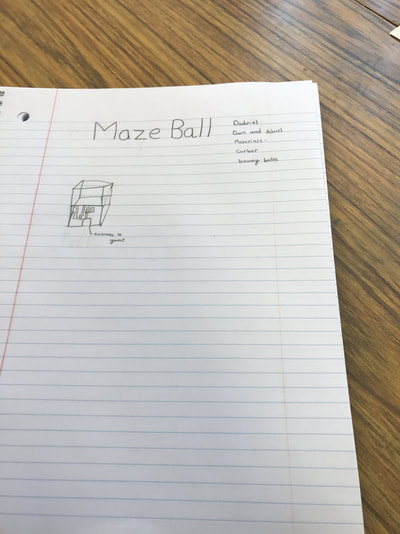
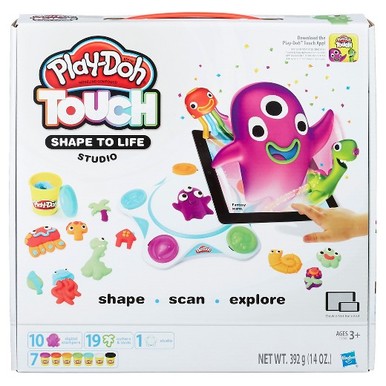
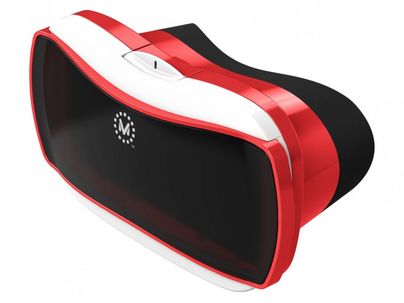
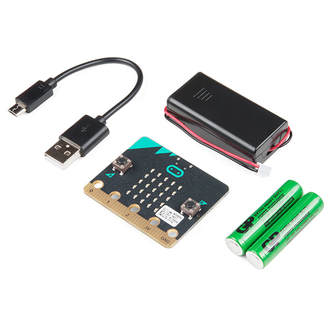
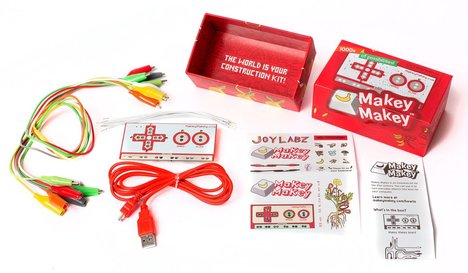
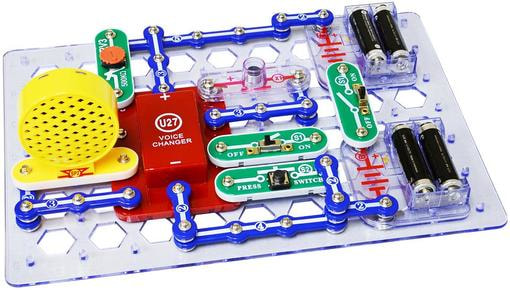
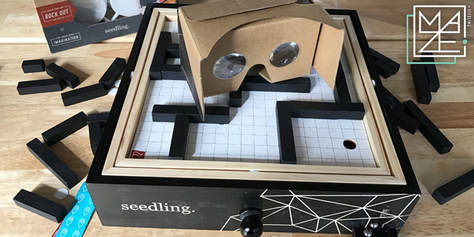
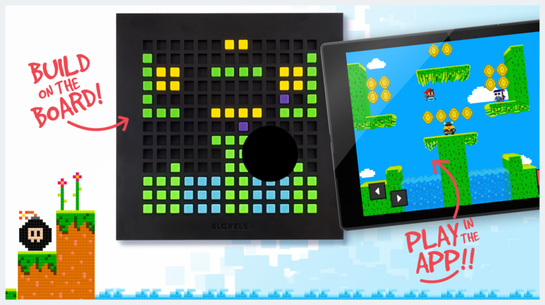
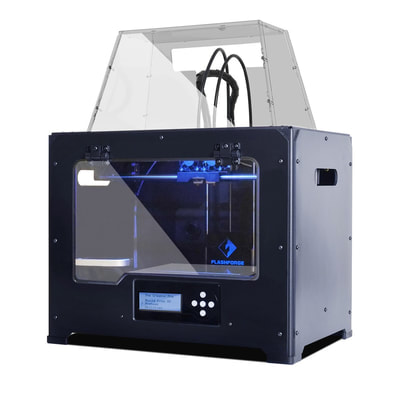
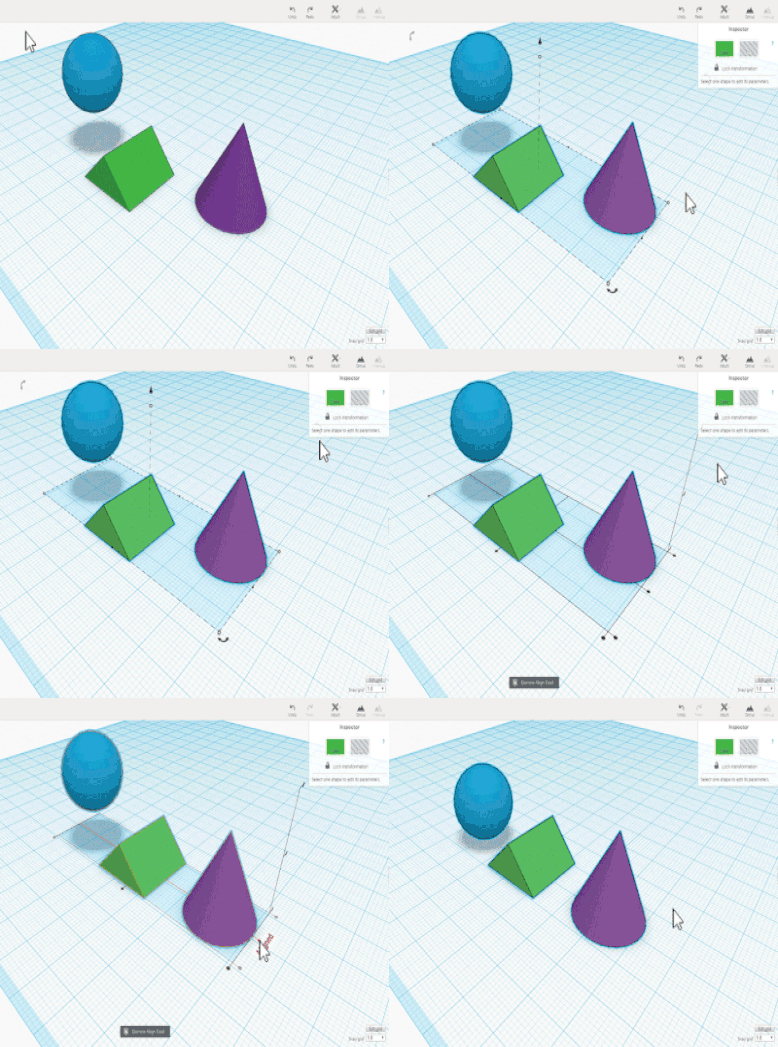
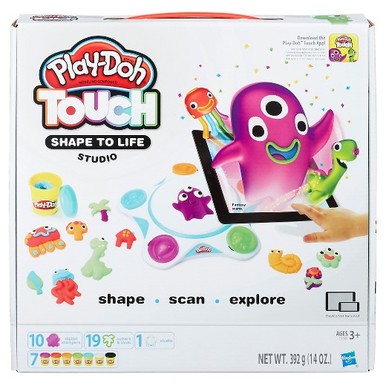
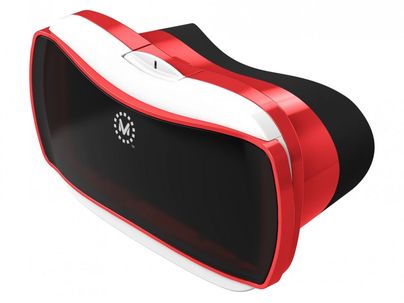
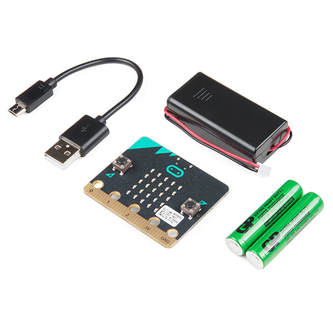
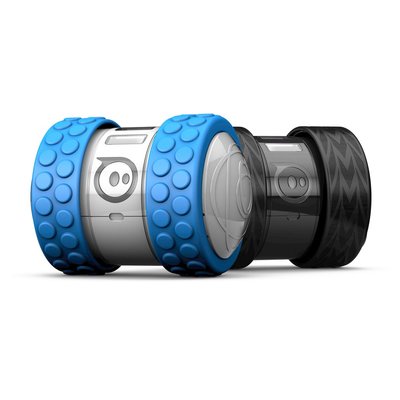
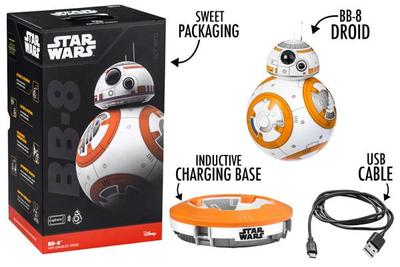
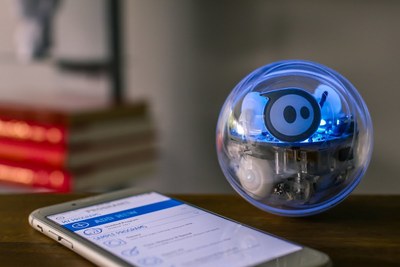
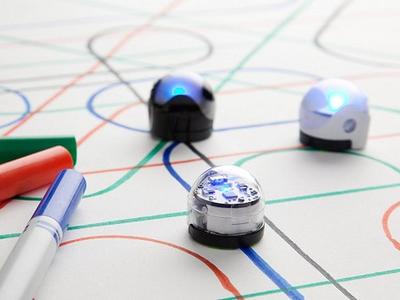
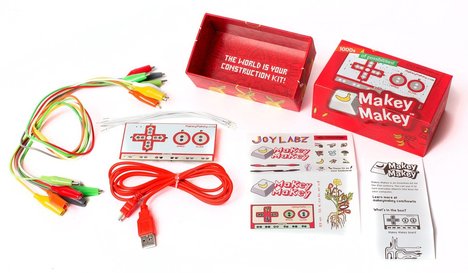
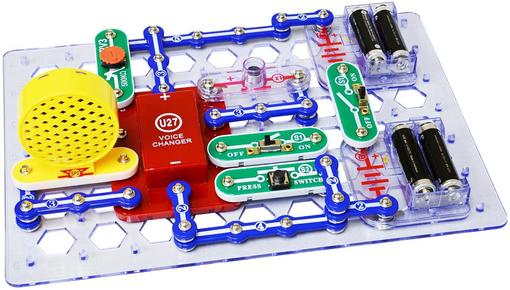
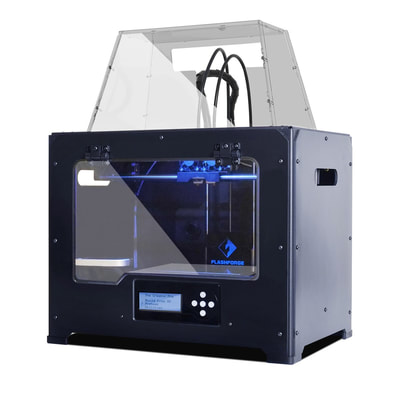
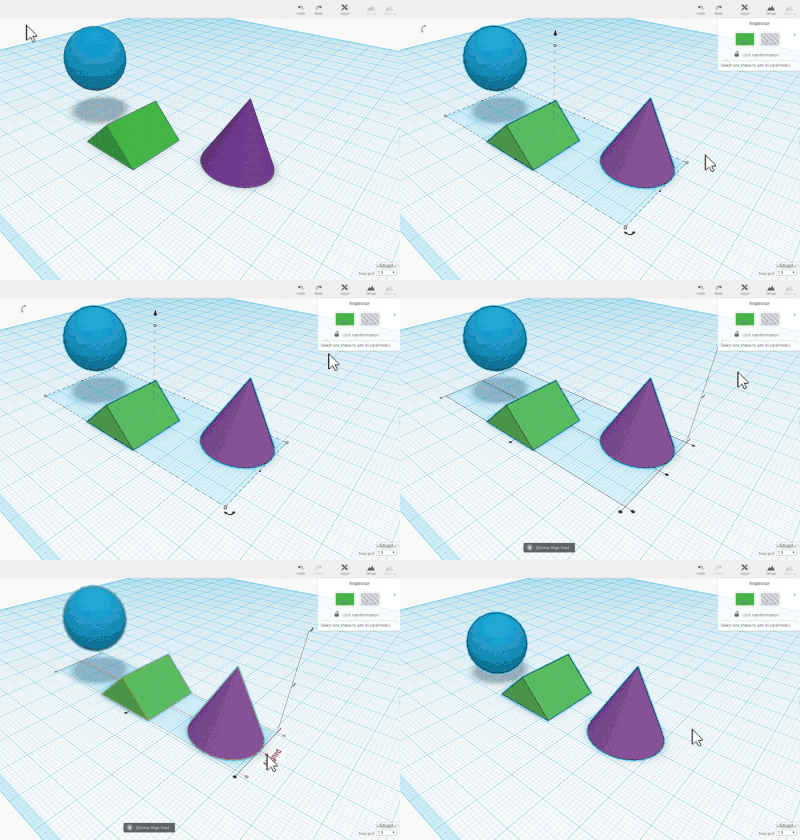
Feel free to use it, change it and make it your own. Also, because of how the program is designed, it allows for students to work independently and for teachers to facilitate. Going into this school year, I knew I needed to change up how I would try and deliver a new academic standard for my students. Computer science is incredibly, incredibly important for this generation of students. So much so, that I believe it deserves a chunk of time in every multiple subject classroom and specifically kindergarten through 6th grade. How are you reaching content standards?This is my 4th year teaching and since then I have tried to find ways to incorporate technology with how I teach. This goes beyond what should be the norm now: casting, Google classroom, etc. Instead I was trying to make sure I could fit in robotics, 3D printing, circuits and more. Whenever I would speak to other teachers about technology and incorporating it in our classrooms, I would usually get a common question: "How does this connect to content standards?". What I didn't want was to hit standards that had to do with public speaking skills or how I was delivering content standards, but instead I wanted students to explore technology that are the beginning blocks of future jobs. The question I then had was this: Why not 30 minutes a day of pure technology? Why not 30 minutes a day?We have blocks of time for English, Math, Science, History and more. These times are important, but then how can we expect students to want those high level technology jobs if their only exposure at a young age is a tablet, Youtube and Angry Birds? If we want our children to develop into great musicians, athletes or learn a new language, we are expected to have them start when they are young. So why are we starting off high level technology in middle school and high school? The fact of the matter is that we cannot continue without introducing higher level technology in our classrooms. "It's too difficult" says the teacher, not the studentI have had highly educated people, educators specifically, tell me that it is too hard to learn all this "tech stuff". If this is true then how was it possible for these same people to obtain a Bachelor's degree, credentials and for many, their Master's degree? There is a difference between not being able to, not having the resources and not wanting to. If we have a student that says they can't, do we throw our hands up agree with their statement. No, we don't. We find new ways to get the information across to them. The same should be true for those teachers who want to make a technology leap but don't know where to start. So let's remedy that! Let's learn together!So I recently started online tutoring sessions with my 6th grade class. It has helped them with their math and parents are excited! Now I want to do the same with teachers who want to see higher level technology in action, want to learn how to use it, how to apply it in class and more. I'll be tweeting out my first session soon, so please follow me @jesush1979 on twitter! Below you will see the items I have available in my classroom, just in case you want a model to start with, copy, modify and more. Stations can make tons of technology accessible!Below you will see how I have my technology stations set up. By having one each, there is the chance to spread students around and not just focus on one type of technology. Instead of spending $1000 on just robots, the same could be used to introduce different types of technology. Station rotation allows teachers to increase accessibility for students, so by applying this to technology we allow accessibility for students. This includes those that may have the means but especially those that otherwise would not have that opportunity. The layoutWhen students are split up, they go to one of several stations. These include the following: Bloxels, Makey Makey, Snap Circuits, VR, Maze by Seedling, Play-doh Touch, Ozobots, Robotics, 3D printing, Micro:bit and Piper computer kit. Below is each item included in my tech stations, along with a Hyperdoc to get started! Play-Doh TouchPlay-Doh touch-a great tool for creativity and design! Students will create characters using the molds provided but also can create their own characters and explore the Play-Doh world. See below for a flower to come to life! Hyperdoc link: https://drive.google.com/open?id=15rPuoxKw6XkX8qU2Enh27MOXcC1wj-XHCdfzW-GEu_A Viewmaster VRTons of options with VR! Students can use Google Streetview to explore locations they normally would not be able to visit. Titans of space can let them explore the solar system and get an idea of how small we really are! Hyperdoc link: https://drive.google.com/open?id=1APGkDjgWsq6YD6gLM7miSDWTgnDIMsxJ-X2SYbP_NgY Micro:bit Go A great little board that comes packed with tons of great stuff! It can be coded or programmed, plus it can sense direction when it is tilted! Oh and it has Bluetooth to interact with other devices! Hyperdoc Link: https://drive.google.com/open?id=1xlOQAI3P3r59n4zSotCz6a1oGY8g0YPfzukhWLNEXww Robots, robots, robots!In total I have 4 Ozobots, 1 Sphero sprk, 3 BB-8s, 3 ollies and 3 spheros. This allows for a decent group of students to work one to one with robots, instead of having them work in pairs. It can be difficult to sit around waiting to get a chance to code, so instead they will work individually then group up to compare the robots they are using. Hyperdoc link: https://drive.google.com/open?id=1LDXT0taZ97jsw6X1Dq67SAurYY1RN-x7uBMWUu2ZRTA ozobots: https://drive.google.com/open?id=1tMPkO16-eG0NQIuJklAC__D-O8OJXvx4klvvQ4HjvoE Makey MakeyA great tool for understanding how electronics work and unleashes creativity! Allows students to understand what will and won't conduct electricity, plus you can challenge students to create with your desired materials! Hyperdoc link: https://drive.google.com/open?id=1dtsbnt-8DAkdNWmxDRGnplR9JagXbapikH6mM0H9bds Snap CircuitsA great tool to get students interested in electronics, plus it allows for a lot of customization. Includes an idea book with 125 projects! Use a few of these to get students started, then let them make their own creations and figure out what works and what doesn't! Hyperdoclink:https://drive.google.com/open?id=19FkEQJYZMIH2PDbmXqhX3Xdcyt7Qc4pSngWSx9mONMc Maze by SeedlngHere the students create their own Labyrinth style maze. Once it can be solved, they can use the Maze app and convert it to a VR maze. It can be customized with pictures, traps and even questions that unlock the next section! Hyperdoc link: https://drive.google.com/open?id=14d7m2v44K4whDU9xNXN93voa2Xo61cpvydMjOSVRMj0 BloxelsA really great and deep app, Bloxels allows students to create their own games! From character design, level layout, level appearance, enemy design and enemy AI, students are creating everything pixel by pixel. This can be pushed even further by implementing specific guidelines, such as having it be themed to a subject or holiday. Hyperdoc link: https://drive.google.com/open?id=11HvJgIpODCulUHqKTalpTYluAuzcHBn-2K7y7nva1YE Piper computer kitA DIY (Do It Yourself) computer kit that students and their teacher can put together, it comes with a Raspberry Pi computer. The awesome thing about this is that the computer comes preloaded with a Raspberry Pi version of Minecraft that is customized to teach students about electronics, computer science, engineering and more! Hyperdoc link: https://drive.google.com/open?id=1Zj-3BX4O134KIGGPT-vsDYJ-qafLirnvPIcQM2ahI4A Flashforge Creator Pro 3D printer and TinkercadOne of the best creation tools is a 3D printer and when a students takes their created item in hand, there is no better reaction to witness! With Tinkercad you have a 3D design platform that will run on anything from a Mac to a Chromebook.
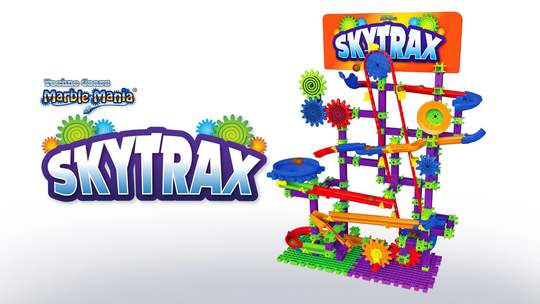
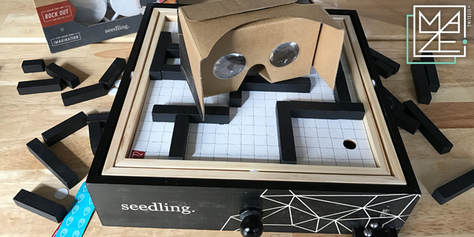
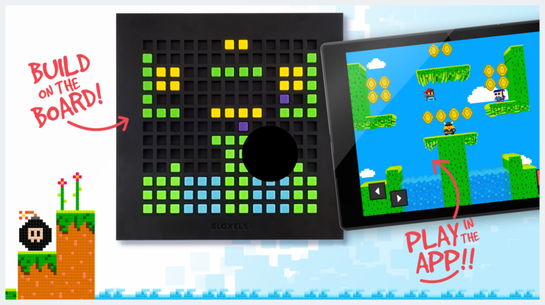
Stations are a staple of most elementary classrooms and are great for getting students to work at different levels for different subjects. Here's a link to stations just in case you weren't sure what they are. This year I want to change up how stations work and also how technology is seen in the classroom. Instead of just an hour of code, I want to devote 30 minutes a day Monday through Thursday and an hour on Friday to technology, design, maker, computer science and engineering. The following items are what I have and will implement this coming year as part of my station rotation. I'll follow this up with some hyperdocs for each! Play-Doh Touch Play-Doh touch-a great tool for creativity and design! Students will create characters using the molds provided but also can create their own characters and explore the Play-Doh world. See below for a flower to come to life! Viewmaster VRTons of options with VR! Students can use Google Streetview to explore locations they normally would not be able to visit. Titans of space can let them explore the solar system and get an idea of how small we really are! Micro:bit Go A great little board that comes packed with tons of great stuff! It can be coded or programmed, plus it can sense direction when it is tilted! Oh and it has Bluetooth to interact with other devices! Robots, robots, robots!In total I have 4 Ozobots, 1 Sphero sprk, 3 BB-8s, 3 ollies and 3 spheros. This allows for a decent group of students to work one to one with robots, instead of having them work in pairs. It can be difficult to sit around waiting to get a chance to code, so instead they will work individually then group up to compare the robots they are using. Makey Makey A great tool for understanding how electronics work and unleashes creativity! Allows students to understand what will and won't conduct electricity, plus you can challenge students to create with your desired materials! Snap Circuits A great tool to get students interested in electronics, plus it allows for a lot of customization. Includes an idea book with 125 projects! Use a few of these to get students started, then let them make their own creations and figure out what works and what doesn't! Marble Mania Skytrax While not necessarily technology based, here is an opportunity for students to explore engineering. They can be challenged to build a track with only certain parts or work together to complete the Skytrax. Maze by SeedlngHere the students create their own Labyrinth style maze. Once it can be solved, they can use the Maze app and convert it to a VR maze. It can be customized with pictures, traps and even questions that unlock the next section! Bloxels |
About me
Hi! My name is Jesus Huerta and I help kids find their creativity by making things! Tech comes second and all that jazz. Contact me with ANY questions at [email protected] Archives
April 2019
Categories |





 RSS Feed
