|
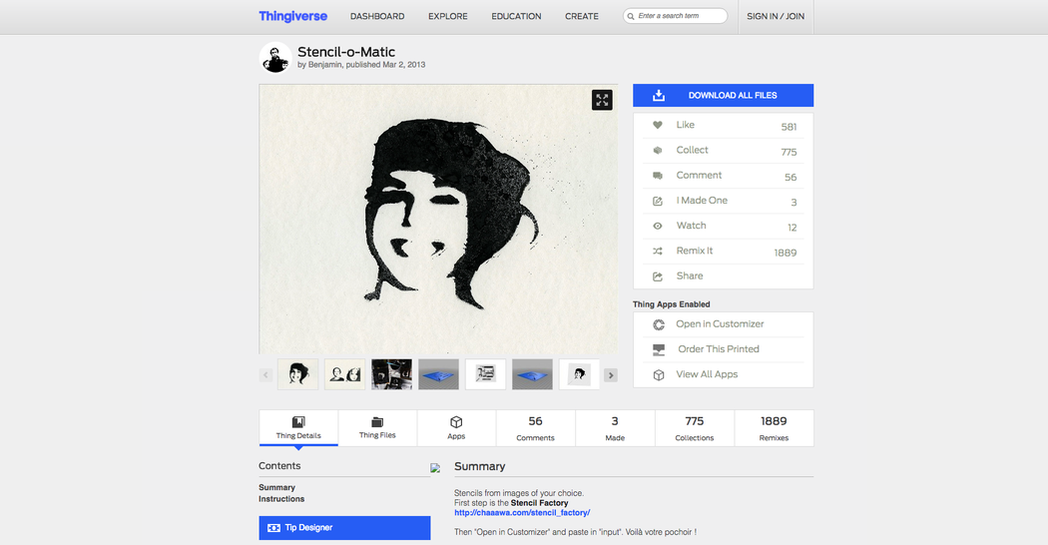
In a previous post I covered how to make a stencil out of silhouettes but now lets take a look at how to make a stencil out of pretty much any drawing, including hand drawn creations from your kiddos! 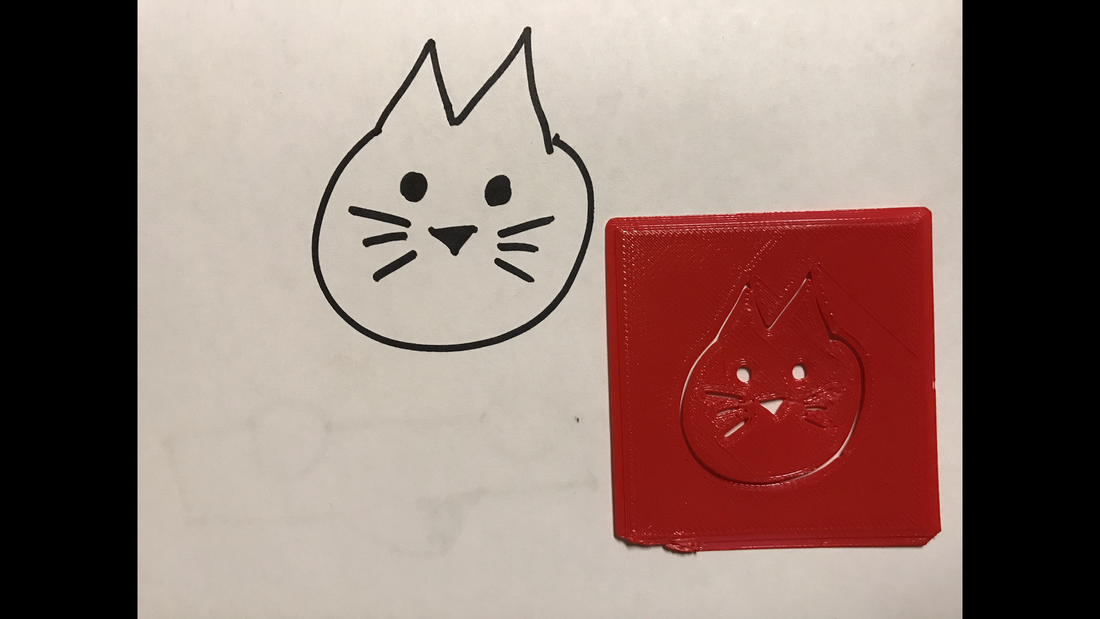 You'll need a couple of things to get startedYou will need a couple of items to get started: the stencil'omatic from thingiverse and a program called Openscad. Both are free and linked below!
Lets start with the stencil'omaticClick where it says Download all files 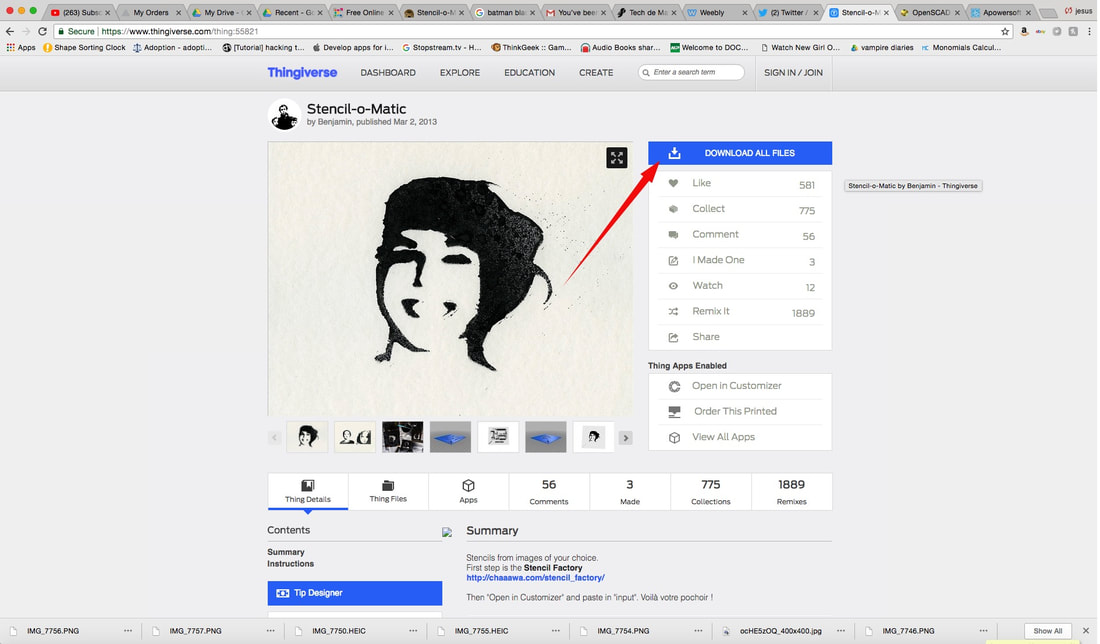 Double click the zip file so you can see the folder that contains everything we will need. 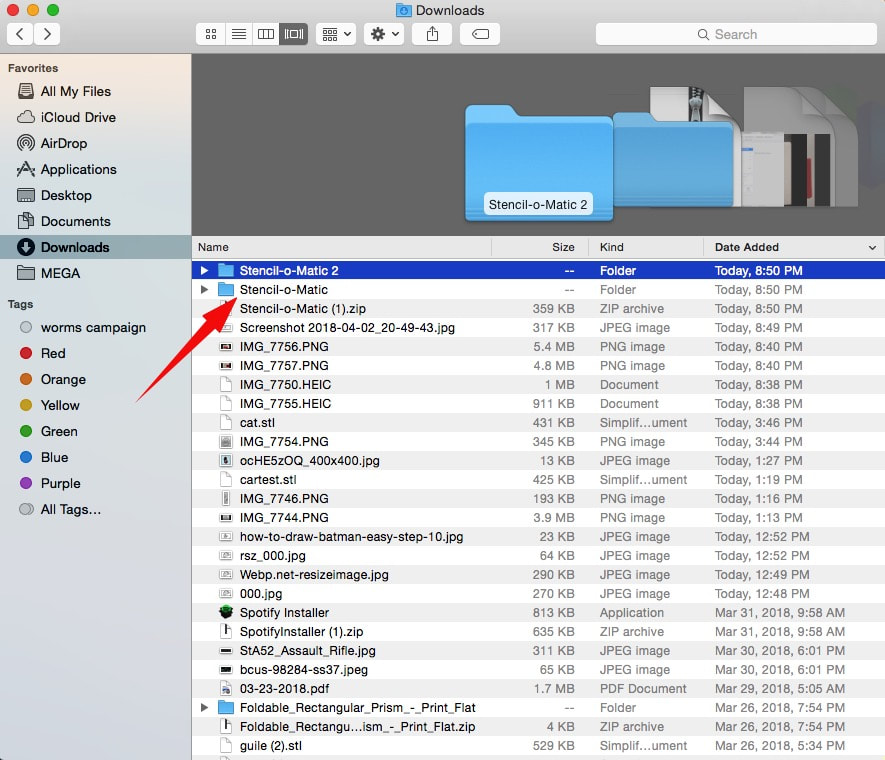 Now download Openscad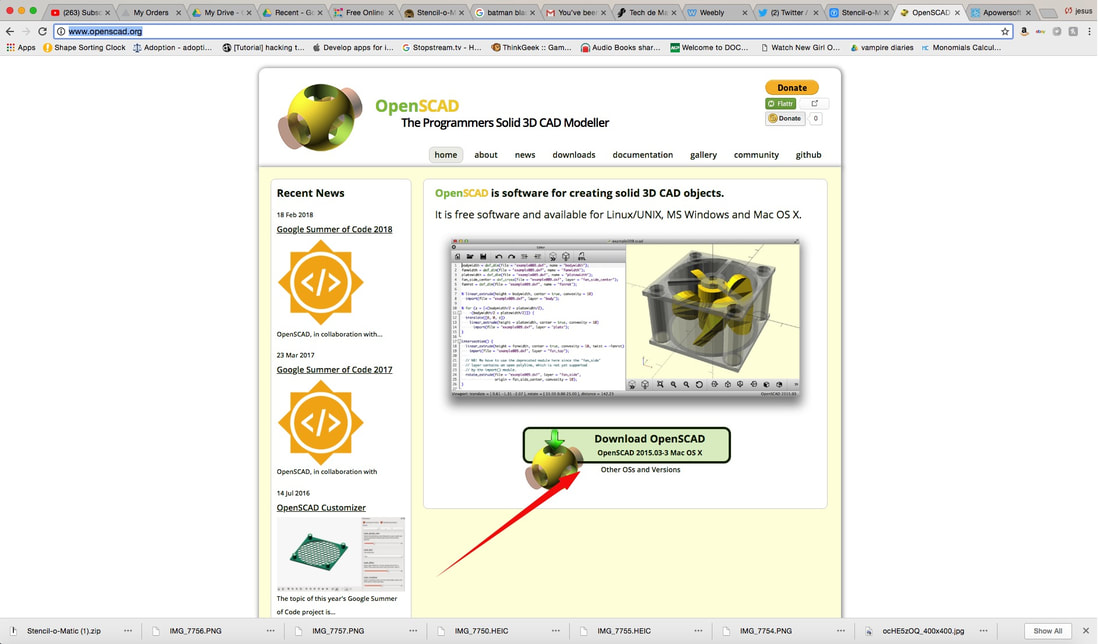 Double click the file that is downloaded and drag Openscad to the desktop 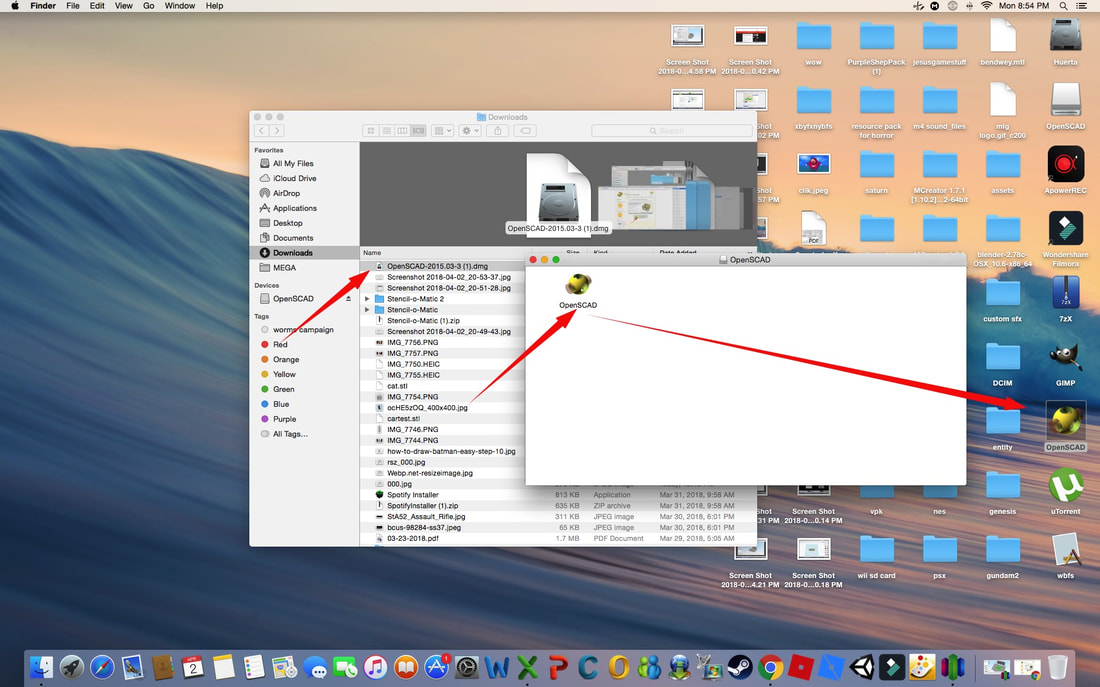 Use the following link to go to the Stencil'omatic tracer!  Click on choose file and pick a drawing 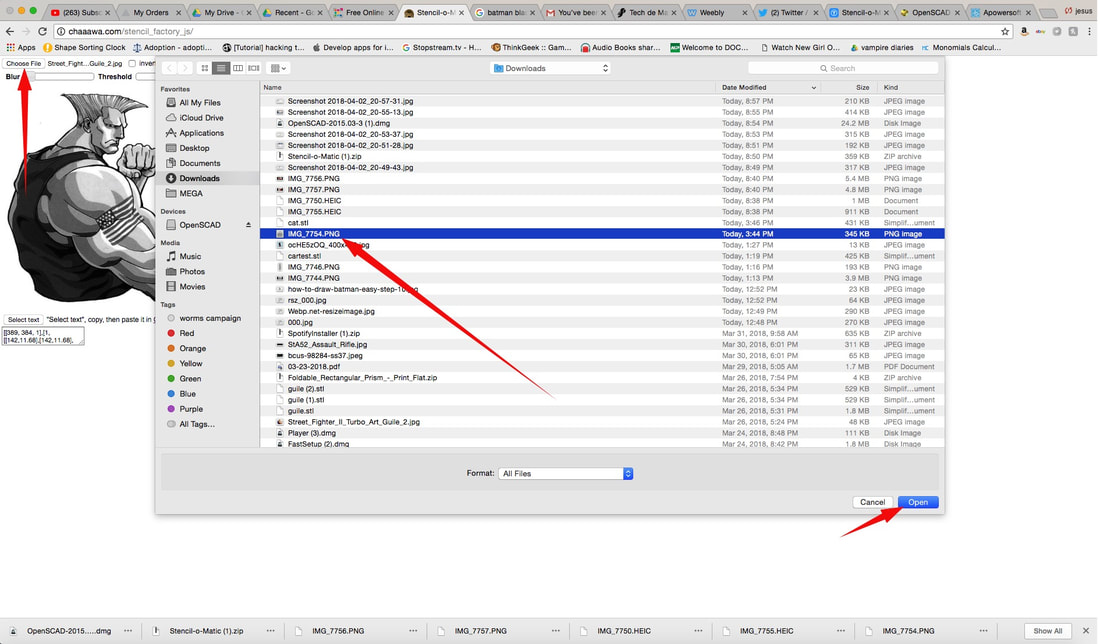 Your drawing may come out like a silhouette but no worries! Here is where you need to double check something! Is the picture found online or taken from a student drawn item? If drawn and taken a picture of, make sure you have your camera set to a black/white filter. If not, you may get silhouettes so please make sure to have that setting in place! 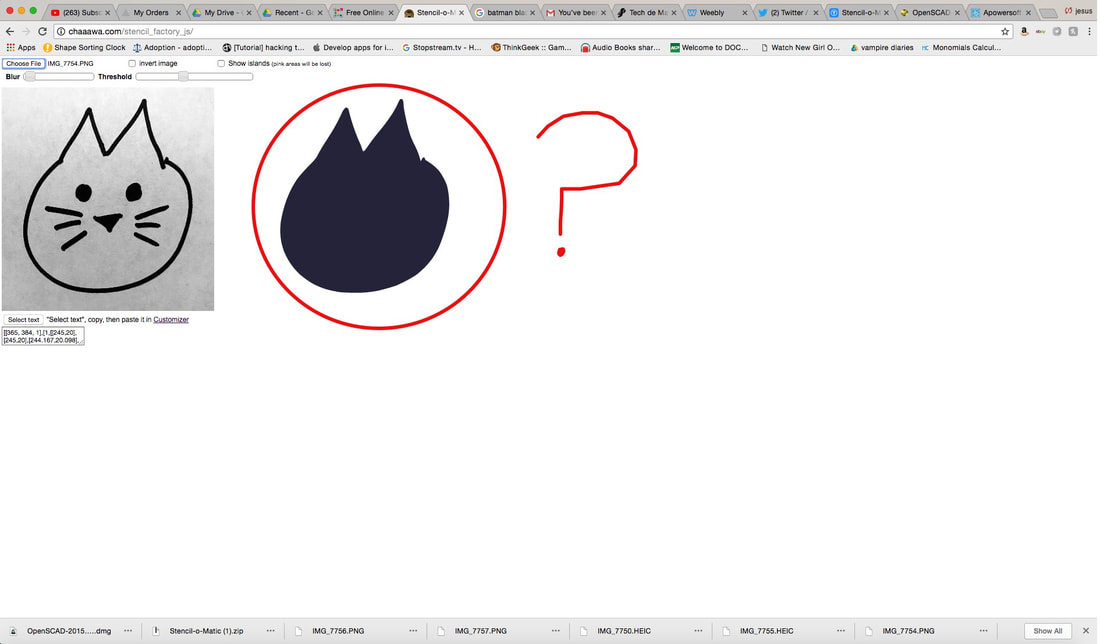 Play with the Blur and threshold settings. You'll notice I pushed the blur all the way right and then you can change the threshold using the arrow key. This will result in the smallest increments and let you find that sweet spot! 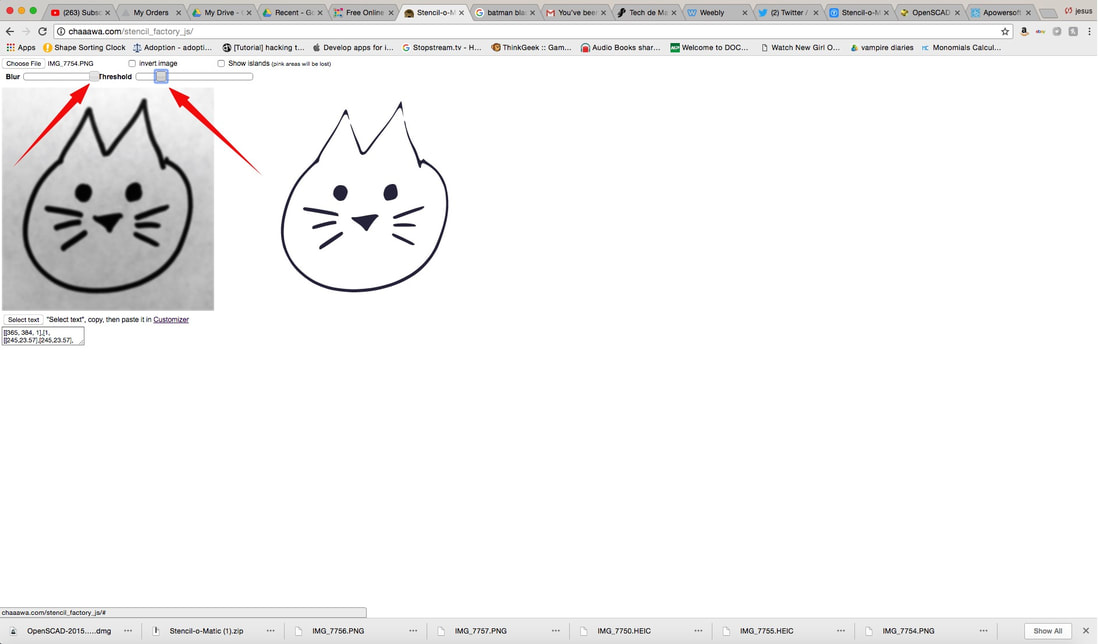 Next click on select text and do a quick copy with a right click or "command c". Now let's jump over to Openscad! 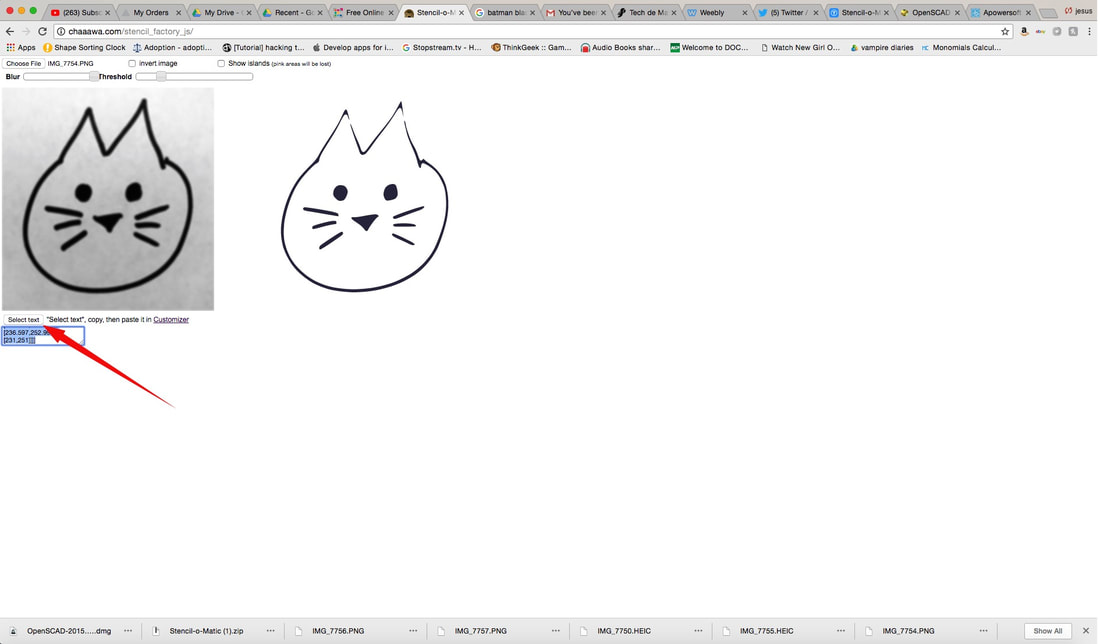 Let's use Openscad!Double click on the Openscad icon and then click on open 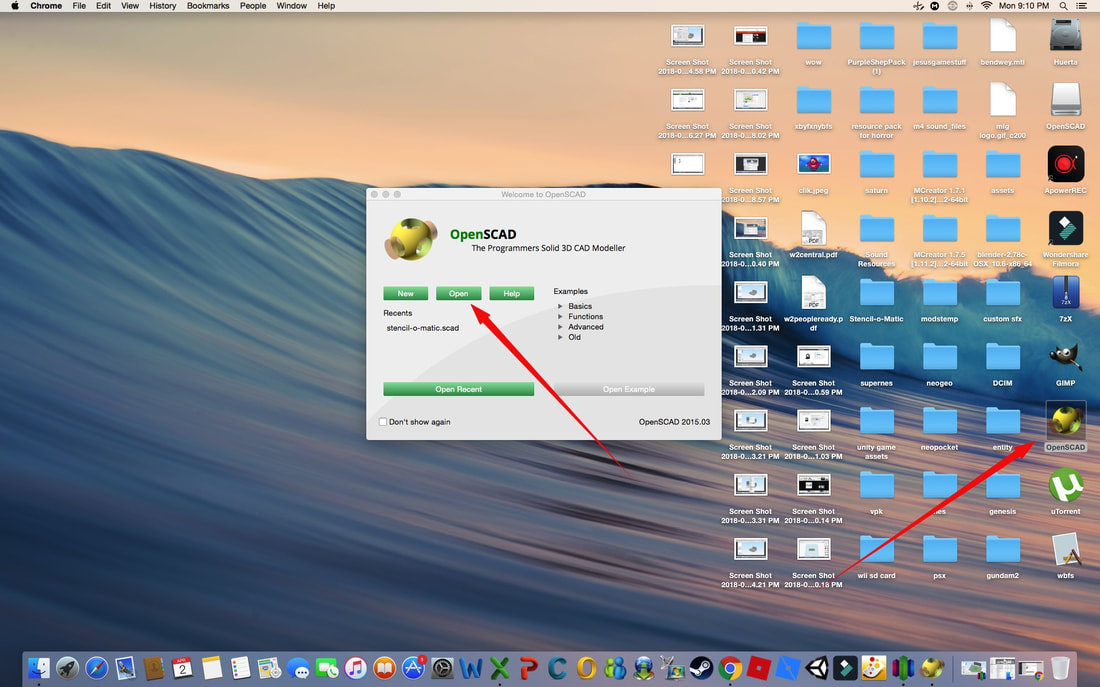 Now navigate to the stencilomatic folder we opened earlier and open the scad file pictured below. If you can't find it, go back and double click it again. This time grab the folder and drag it somewhere easy to access, like your desktop! 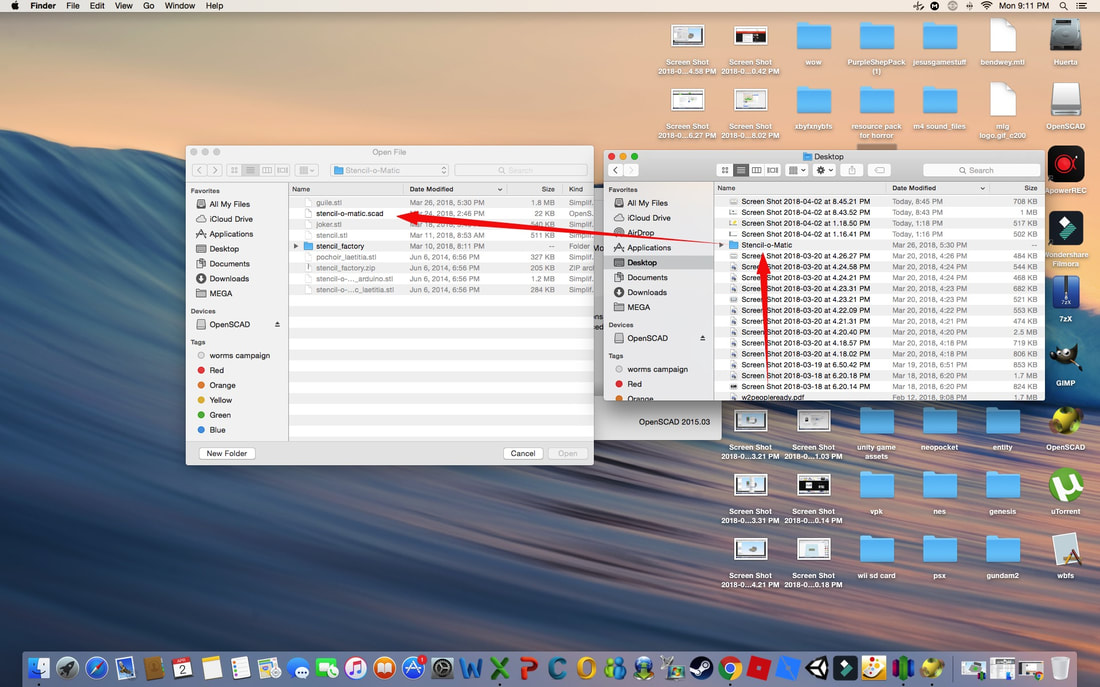 Find this spot on the next window that opens up. Here we will input the code that was copied earlier from the tracer website! 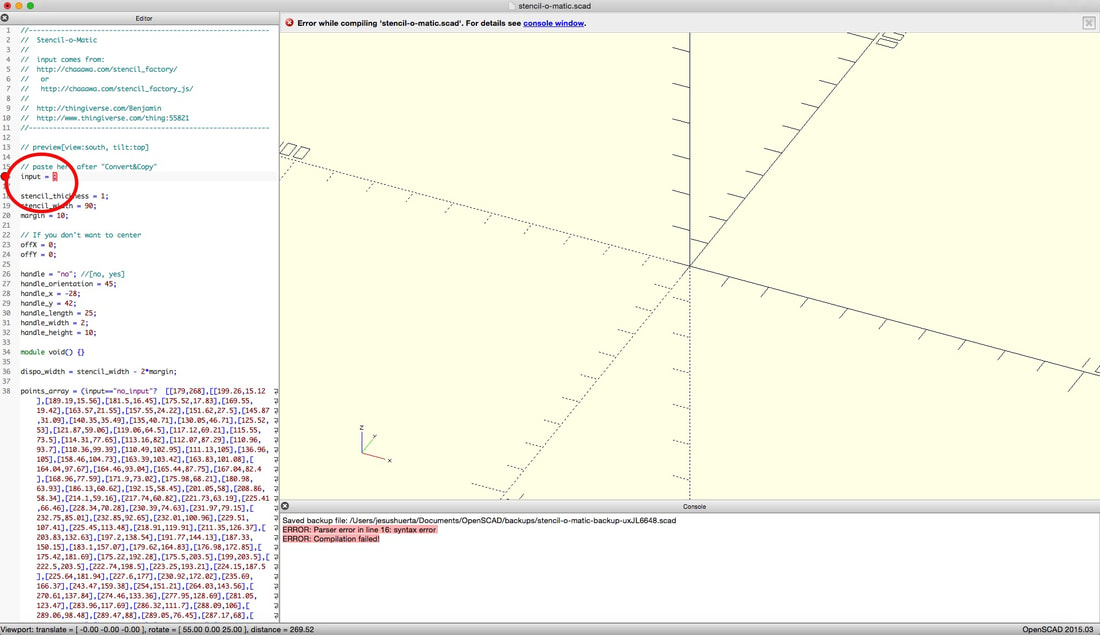 Once you have pasted or command v, go ahead and click on design then on render. Wait a bit depending on the computer you are using. 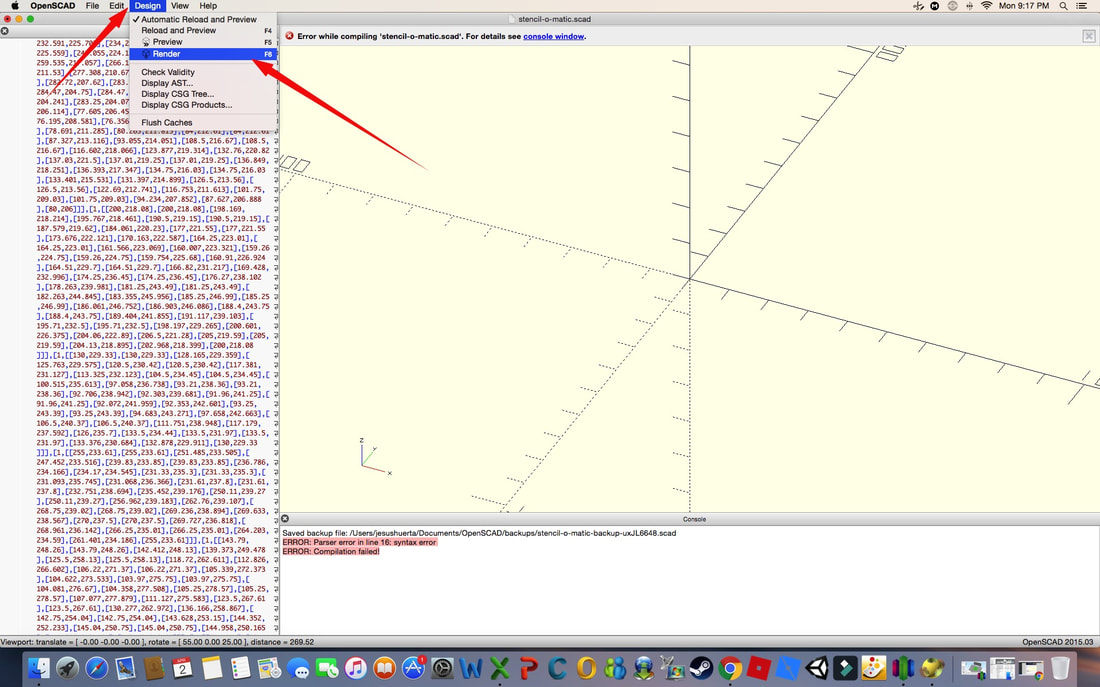  Now click on file, export and then choose STL. Next you'll load it into your slicer software and off you go!  Wait! What about all that code when I go back for another stencil?Go to the top of the code and click right after the equal sign and then hold shift and don't let go 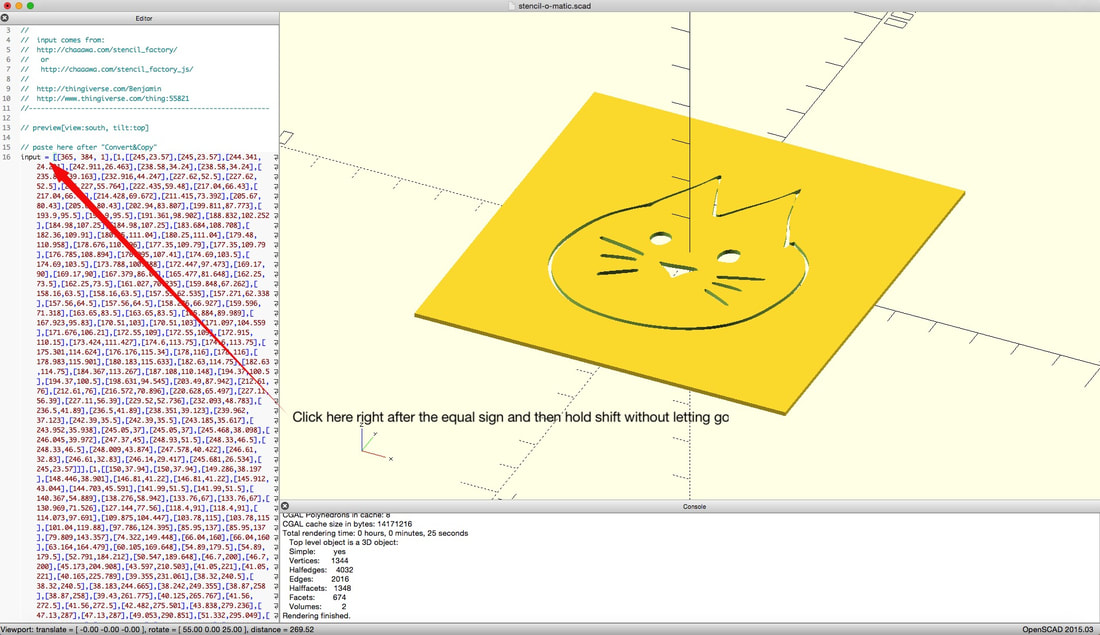 Scroll to the bottom of the code and then click right before the semicolon while still holding down shift. The code will be selected and then you can paste over it! Awesome! 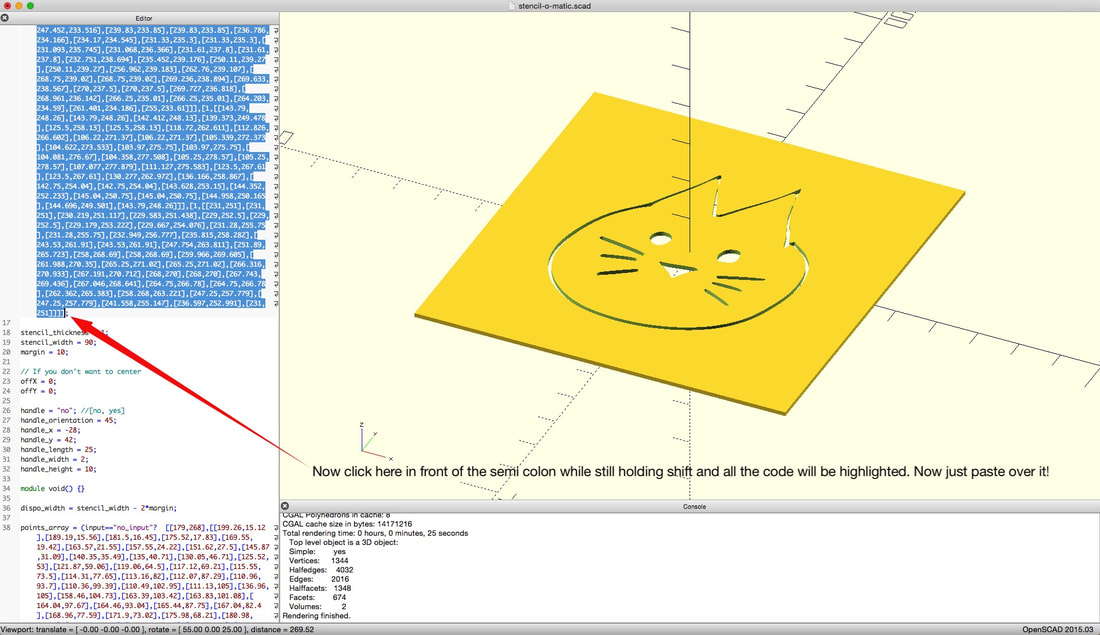
1 Comment
3/4/2024 06:49:58 am
A 3D creation engine is a sophisticated software tool designed to facilitate the development of three-dimensional content, such as animations, games, and simulations. It provides users with a comprehensive suite of tools for modeling, texturing, lighting, and rendering scenes. With its intuitive interface and powerful features, a 3D creation engine empowers creators to bring their imaginative visions to life with precision and efficiency, enabling the creation of immersive and visually stunning digital experiences across various platforms. Leave a Reply. |
About me
Hi! My name is Jesus Huerta and I help kids find their creativity by making things! Tech comes second and all that jazz. Contact me with ANY questions at [email protected] Archives
April 2019
Categories |
 RSS Feed
